Nambu
World: Type 26 Holsters and Accessories
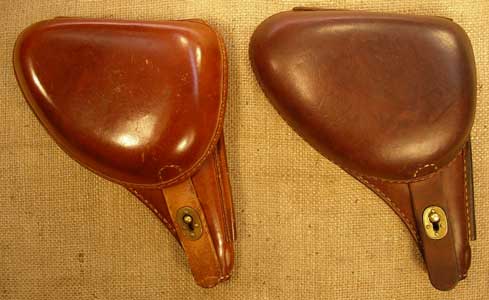
I have two Type 26 holsters and a
cleaning rod. The holsters are not that hard to get because there is less
interest in the Type 26 revolver than in other Japanese handguns. Cleaning
rods, however, are very hard to find. Here are the two holsters side by side.
The left one is dated 1942 and the right one, 1939.
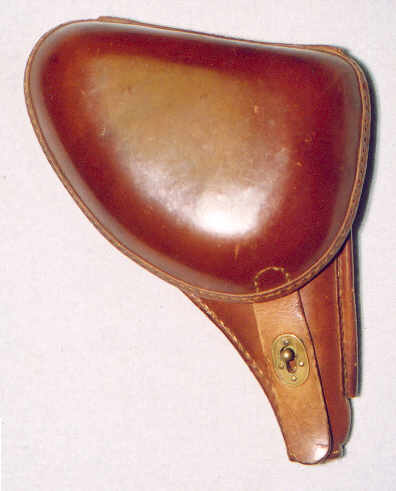
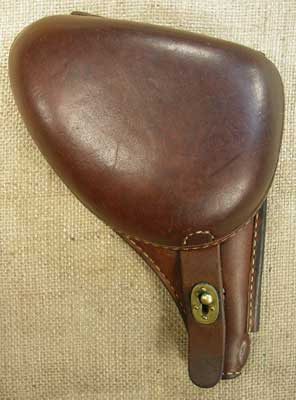
Let’s start with the one on the
left. When I bought this original Type 26 holster it was in excellent condition
with one small flaw: the head of the top rivet in the closure fitting was
missing. My husband made a replacement that press fit in so that the appearance
was restored without making any permanent change to the item. Apparently most
of the issue holsters were so beat up by the late 1930s that production was
re-started. This one appears to be dated 1942 (see below).
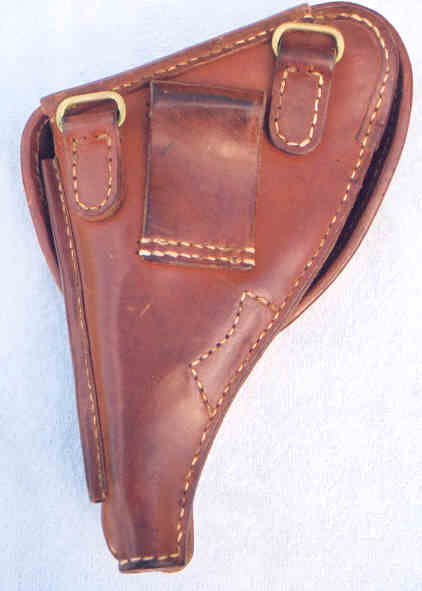
This is the back with brass fittings for the
shoulder strap and a belt loop.
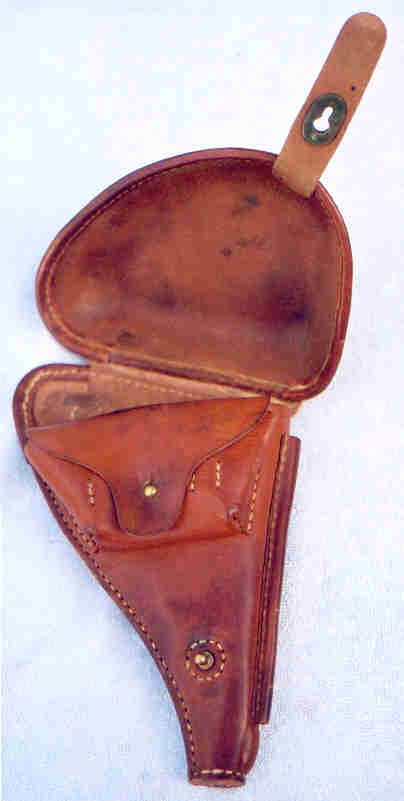
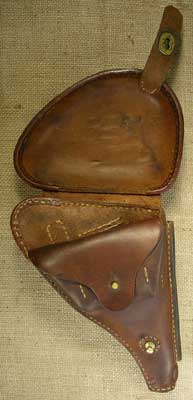
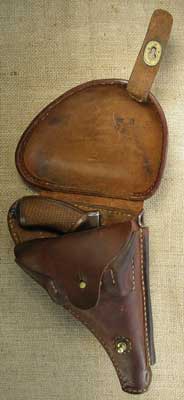
This shot with
the clamshell open shows the ammo pouch and the slot added onto the front
(right of photo) for a cleaning rod. The rods are very rare. They are steel
with an offset loop at the top. Some holsters have been found with a brass
L-shaped rod, but I have been told by a top authority that these are not
correct and may have been a machine gun tool that got adapted to this purpose.
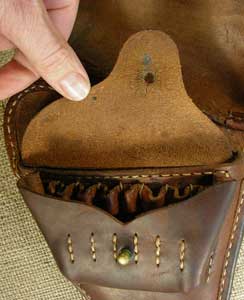
Here is a close-up of the inside of
the ammo pouch. It has loops for eighteen rounds of 9mm revolver ammo. There
are three rows of loops. The top row on the body of the holster holds eight
rounds, with another row for six rounds right beneath it. The inside front of
the pouch has loops for four rounds, two on either side of the stud.

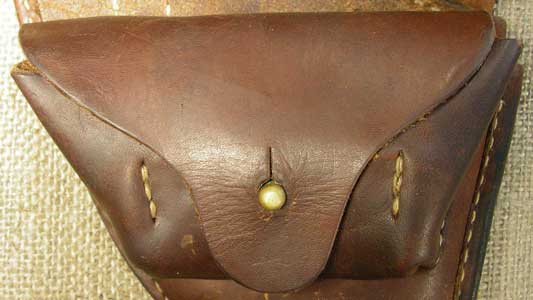
This
close-up shows the holster’s one flaw: the missing head on the top rivet in the
fitting of the closure. This closure is very similar to the ones on early Type
14 holsters (see the part of the website on Type 14 accessories for a photo)
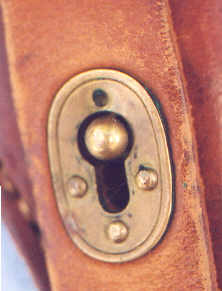
Here is the closure with the
replacement rivet head press fit in. My husband machined it out of brass and
then touched it with bluing to take the shine off. A very close examination
would show that the tops of the original rivets have been partially flattened
in the installation process, while the new one is still rounded.
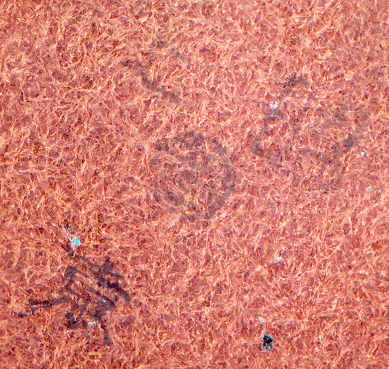
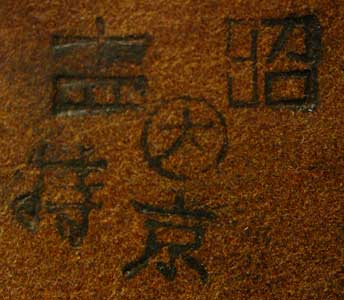
These are the markings, which again
appear in the middle of the inside of the clamshell. There are four markings.
The one in the bottom left is the character kyo as in
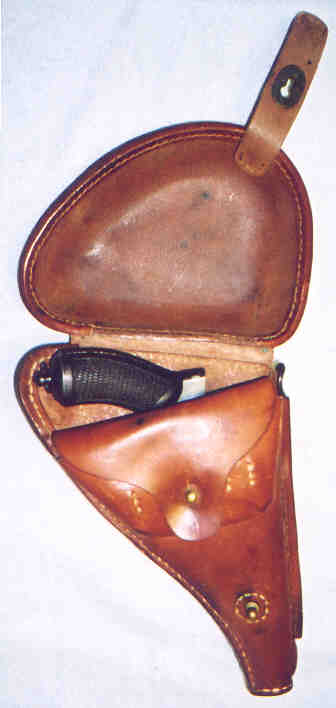
Here is a shot of the holster with the revolver
and cleaning rod inserted (but no rounds in the ammo pouch).
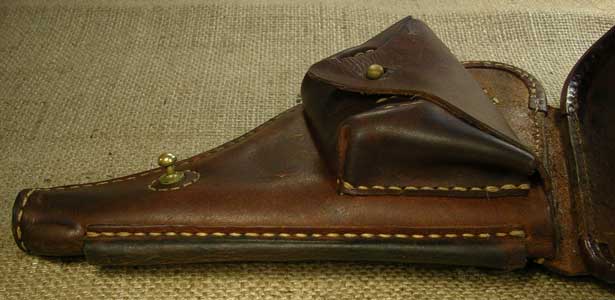
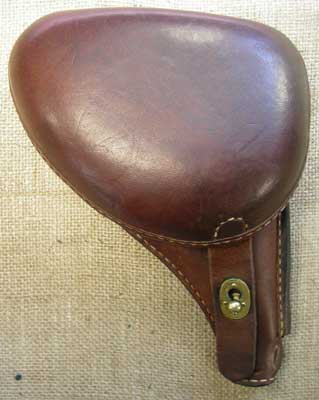
This was my second Type 26 holster,
although it was made earlier. I got it in March, 2005 as part of a large
collection I bought (six handguns, several holsters, etc.). In this front view
you can see that the previous owner used a high quality leather preservative on
it, which made the colour browner and flatter (the
original coloration is more reddish brown and has a slight sheen like the
holster shown above). I do not recommend using any leather preservative product
on a holster except as a last resort.
Here is the back. Note the steel rings (more on them later). Note also the sideways-M-shaped stitching on the right edge about two-thirds of the way down. I will describe what that is for later.

Here is the holster open and empty. Note the wide pouch, which will be illustrated in depth later; the slim pocket along the front edge (right side of photo), which houses the cleaning rod; and the black marks slightly above and to the right of the centre of the inside of the clamshell flap—these will be explained next.
Here are
the markings. The top row reads from right to left. The character on the right
is the sho
in Showa, meaning the reign of Emperor Hirohito. To the left there are actually
two characters piled one above the other. The top part that looks like a plus
sign is a ten and bottom part that looks like a rectangle divided into three
squares is a four. These two characters together mean 14. The Japanese military
often superimposed two characters in a date so that they could be written in a
more space-saving way. Taken together, the top line means Showa 14, the
fourteenth year of Emperor Hirohito’s reign, i.e. 1939. Below that are three
marks that I think are all inspection marks. The one in the centre surrounded
by a circle is the kanji character dai, which in isolation means “big”. The one in the lower
left is the kanji toku,
which taken by itself means “special”. The one in the bottom centre is the kyo in
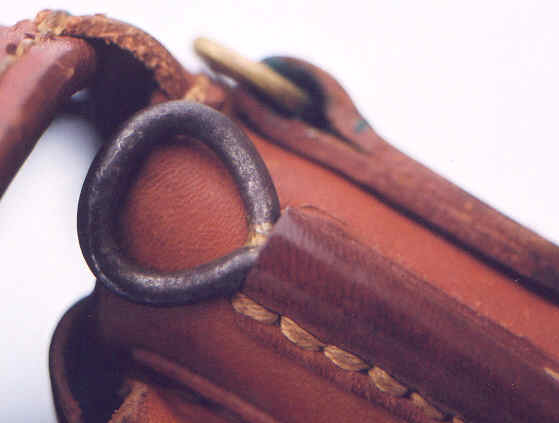
Here is a shot of one of the rings and its retaining loop. A magnet test confirms the initial impression that the ring is made of steel. All the other metal fittings are non-magnetic brass.
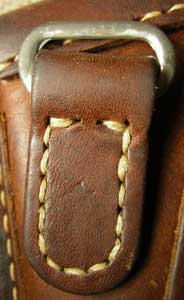
The ring has remnants of some kind of thin finish, either very thin plating or perhaps just some kind of wash.

Here is a side view showing that long thin pocket along the front edge for the cleaning rod. This pocket is very dark on this specimen because the previous owner inserted a brass tube in the pocket, apparently out of a misplaced fear that it would shrink. I had to have my husband thread the inside of the tube and use the tap to pull it out. Having the brass tube in contact with the leather for many years caused a huge build-up of verdigris (green waxy crud formed by a chemical reaction between the copper in the brass and the acid used to tan the leather). The verdigris discoloured the pocket and had cemented the brass tube in. My dictionary says it is poisonous, so don’t snack on the stuff or leave it lying around where your kids or pets could eat it.
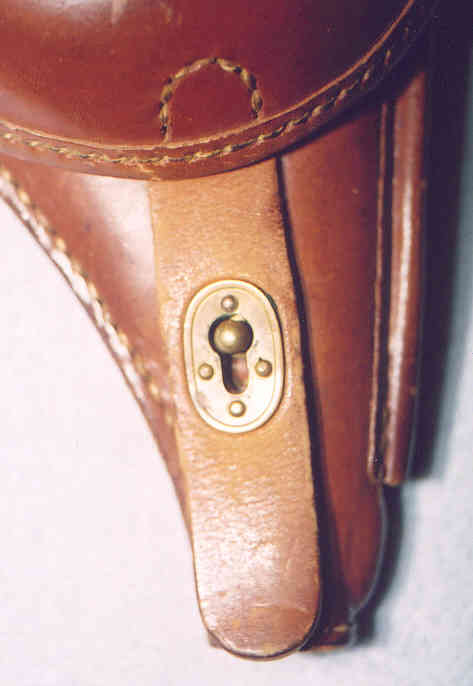
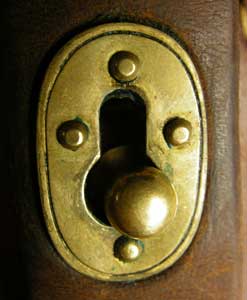
The plate on the closure strap has a decorative groove around the edge. Many early Type 14 holsters also had similar grooves.
Here is the back of the plate on the closure strap. The lighter coloured edge around the top is where I removed verdigris with my thumbnail. If you are going to remove this stuff, always use a very soft, non-marring implement: a fingernail, a Q-Tip, a popsicle stick, a bamboo skewer, etc. Never use anything chemical as it will remove the patina that makes old brass attractive.

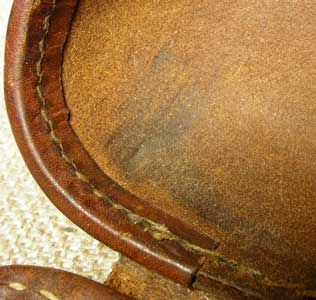
On the inside of the clamshell flap you can see a mark made by the butt of the revolver. It is not as noticeable as in the case of Type 14 holsters as the butt of a Type 26 is made of steel, while the butt of a Type 14 is a magazine base made of aluminum or pot metal (cheap aluminum alloy).
Here’s a look inside. On the left you can see a positioning block made out of several layers of leather: this was to keep the revolver in the right position in the holster. Just to the right of that in the photo, and further down in the holster, is the reinforcing patch over the inside of the closure stud (dome-shaped part with a few stitches visible). The light coloured vertical lines at the bottom of the shot are the stitches for the cartridge loops. The two parallel lines coming from the bottom of the holster towards the top on the right side of the holster are to hold the cleaning rod pocket onto the front edge (you can just see a tiny bit of the top of that pocket on the edge of the holster (right of photo). The two close horizontal lines of stitching in the left side of the photo with a third, single line below it are the stitches for the belt loop.
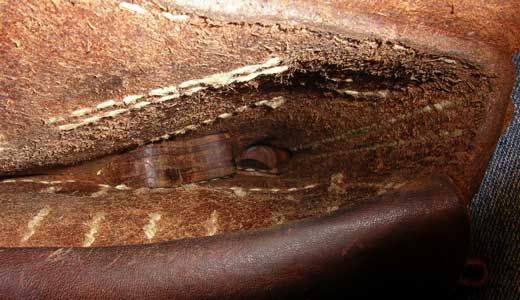
This sideways-M-shaped stitching serves to retain the positioning block inside the holster.

This shot shows the ammo pouch closed and empty.

Here is the ammo pouch open and empty. Inside there are loops for 18 cartridges (enough to reload three times). On the inside of the pouch there are two rows of loops with eight in the top row and six in the bottom. On the outer side of the pouch (the side to which the closure stud is attached), there are an additional four loops.
Now let’s look at the pouch when it is full of cartridges. Note that it looks a little more “filled-out”.
Opening the full pouch we can see the inside upper row of eight rounds (the one on the far right is just barely visible). Note the difference in colour between the outside of the pouch, which was darkened by the use of a leather preservative by the previous owner, and the lighter, redder, slightly shinier shade of the material used for the loops. That lighter colour is closer to the usual original coloration.

Here’s something you won’t see every day. The top view shows all eighteen rounds. It took me a long time to accumulate enough original rounds to fill the loops. Note that the outer row of four rounds is held in place by one strip of leather. It crosses the inside of the pouch closure stud in the middle, but that spot is sewn flat and is not intended to hold a round, so don’t try to force one in. In fact, you should be very cautious about trying to insert rounds in any of these old holsters. Many have dried out and lost their flexibility, so you may damage the leather if you try to force rounds in. The stitching may also not be up to the stress. Fortunately this holster had good leather and stitching. Still, it took a while to get the rounds in as many of the loops had been crushed flat in storage. I lifted them out with a short piece of small diameter dowelling so I could get the cartridges started.

Here is the holster with a full ammo pouch and with a gun and cleaning rod inserted. Note that the closure stud is now down towards the bottom of the keyhole in the closure strap plate.
Here is the whole rig opened up. Note the bulging ammo pouch and the way the cleaning rod’s loop at the top curves to fit the contour of the holster. I think the revolver should actually go a little further in.
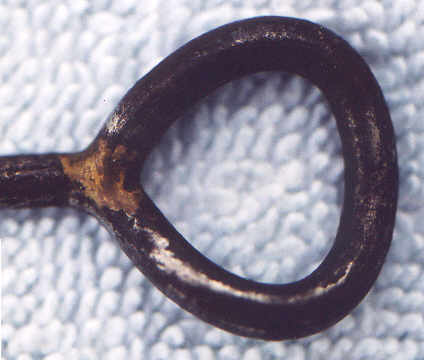
Now here’s the cleaning rod. It was
stored in the long slim pocket attached to the front of the holster. It was
nickel-plated, but this one is heavily corroded so a lot of the nickel is gone.
Most rods had an inspection mark, but this one’s seems to have been lost to
corrosion, if it had one to start with.

A key identifying feature of original T-26 rods
is the brazing used to close the loop. It should be brass coloured
like this.
Viewed from the top the loop is curved.
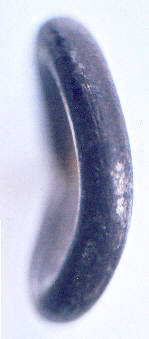
The side view is also curved.
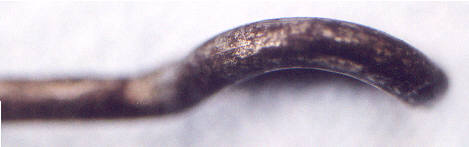
Here’s the reason for the curvature: to fit the
contour of the front of the holster.
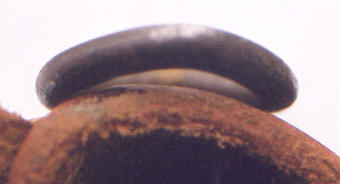
Here it is from the front.
The bottom tip sticks out just a
bit. Until I saw this picture I hadn’t realized that the holster has a little
bulge for the front sight. It’s not as noticeable as the one on Type 14
holsters.

Click here to go back to the main page: Nambu World Home Page
Last updated: July 2, 2006. All contents are
copyright Teri unless otherwise specified and may not be used elsewhere in any
form without prior permission.