Type
26 Photos (Original Finish)
The Type 26 is a double-action-only,
break-top type revolver that fires an obsolete, 9mm rimmed round used only in
this gun. By the 1930s most of these revolvers had seen decades of service so they
were arsenal re-worked by the Japanese. However, some were not reworked and
still retain the original finish. This gun still has the original finish. Here
are some photos.
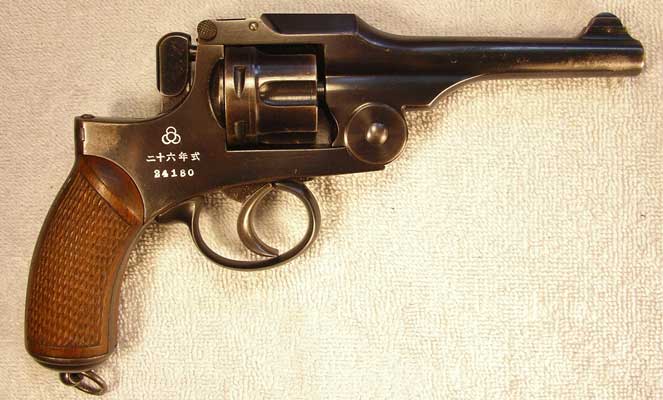
Here is the left side. The Type 26
is comparable to many of its contemporaries designed in the late 1880s and
early 1890s. Perhaps its weakest point is that the cylinder locks up only at
the moment of firing. As a result, if the cylinder brushes against smething it can easily rotate so that an empty chamber is
next in position. A “click” rather than a satisfying “bang” can then ensue,
with potentially fatal consequences for a battlefield user.

The original blued finish is a much
richer, deeper colour. The easiest way to tell at a
glance is to look at the hammer. The original finish is a heat blue that gives
it a sort of irridescent look.

This rather suggestive shot shows the firing
pin and the hole it goes into.

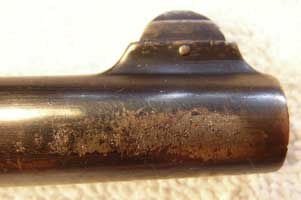
The sides of the end of the barrel
are almost always worn and/or pitted on Type 26s with the original finish. The
holster becomes very narrow at the bottom so this is a spot where friction
occurs and moisture can be held against the metal.
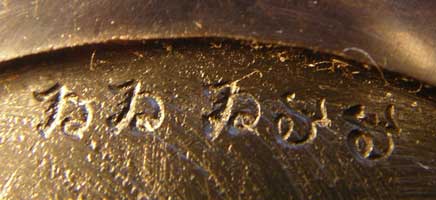
The kanji characters on the butt are inspection
markings.

Here are the rest of them.

The serialization of parts on Type
26 revolvers is a bit complicated because they used sub-assembly numbers which
did not always correspond to the last digits in the gun’serial
number as they did on later models. The procedures also varied over time. In
the serial range which includes this gun, two sets of numbers were used. One
set is based on the last digits in the gun’s serial number and is recorded on
the left side of the frame under the grip. The other set is not based on the
serial number and is recorded on the right side of the frame under the grip. So
let's get those grips off and see what the two numbers are.
Pulling forward and down on the trigger guard
allows it to swing down from its pivot at the front.

Here is the trigger guard in its lowered
position.

This is the spot where you pull open
the side plate. It can be done with just thumb pressure. Often those who did
not know the trigger guard had to swing downwards first damaged this area by
prying with metal tools. This one shows only very light marks. This is an area
you should always check before purchasing a Type 26. Some have been badly
gouged.
Now the sideplate
can swing open like this. The trigger guard can just be lifted off. The side
plate has a screw that retains it from the top. The left grip panel can be
removed by pulling out gently at the top and then pulling upward to remove it
from its vertical reaining pegs (see photos below).

See the pegs at the bottom on either side of
the lanyard ring retainer?

With the side plate and left grip
panel removed, there is a clear view of the lockwork
and the area with the number we are seeking. The number is just to the left of
the lower screw.

The left grip panel is held in at
the bottom by these two pegs (the round thing in the middle retains the lanyard
loop). It is held in at the top by the side plate.

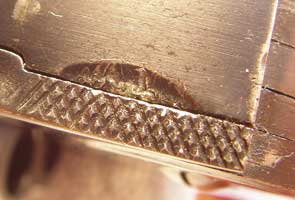
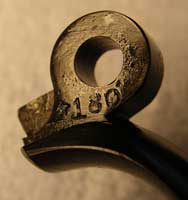
Here is a close-up of that number,
180, which is the last three digits of the gun’s serial number (24180). Just
above the 8 is a katakana symbol ta.
These symbols differentiated between guns that had the same last three digits.

The left grip panel has both the 180 and the ta mark (the latter is just to the left
of the circle, above the 8).

Here’s a closer shot.

Just in between the mainspring and the rear end
of the rebound lever and its screw is another marking, a katakana te.

Just above and to the right of the mainspring
is another katakana marking, ko (looks like a squared
off U, here tilted 45 degrees). This photo also shows the hard part of getting
at the right side of the grip frame to find the other sub-assumbly
number. The right grip panel is held on by two screws. The lower one is easily
accessible (to the right of the 180 marking in one of the photos above).
However, the upper screw is hidden behind the mainspring. Fortunately it did
not take much to turn it so I was able to use a narrower bladed screwdriver to
loosen it without damaging the slot.

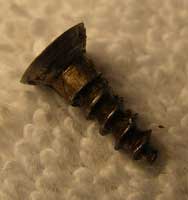
The screws are both short wood
screws like this one. The top one, of course, didn’t come out, it just
gradually released the grip panel.
Here is that right grip frame,
showing the upper screw held captive by the mainspring on the other side, and
three sets of markings: one along the top curved edge, one in the middle and
one along the bottom. The one of greatest interest to us is the middle one: 20
with an 8 above it. This is the second sub-assembly number. The markings along
the bottom and the ones at the top are both the same: multiple repetitions of
the hiragana ru.

Here is a close up of those hiragana along the
top.
The right grip panel itself has both the 180
and katakana ta markings.
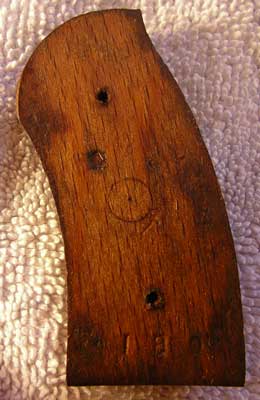
The 180 is at the bottom.

The ta is at the lower right of the circle and
overlaps with it slightly.

The trigger also has the ta and 180 on the right side.

The
cylinder can be removed by breaking open the gun completely (90 degrees, barrel
downward), holding the latch extended upwards as far as possible, and then
gently applying upward pressure on the cylinder while rotating it
counter-clockwise (as viewed from behind). The extractor and cylinder face both
have the “8 over 20 mark” (the 0 in the 20 on the extractor is hard to see
since both the top and bottom are cut off).

Underneath the extractor is the 180 again.

The barrel, shown here at the hinge point, has
the ta and 180 on one edge…

…and the 20 on the other (if you look closely
at the photo of the 180 you can also see the 2 upside down).

The trigger guard also has the ta and 180.
So does the sideplate.

The left side of the trigger has an inspection
mark that looks like an M or W.

To see accessories for the Type 26
revolver (holsters, etc.), please click here: t26accessories.htm
Click here to go back to the Type 26
Gallery: t26gallery.htm
Click here to go back to the Nambu World: Teri’s WWII Japanese Handgun home page: Nambu World Home Page
Last updated: July 11, 2005. All contents are
copyright Teri unless otherwise specified and may not be used elsewhere in any
form without prior permission.