Nambu World: Showa 7,3 Chigusa Type 14 Photos
I bought
this pistol from a

Here is the left side. This side has
a proper matching Chigusa grip with 26 grooves. The right side shown above has
a grip with 25 grooves that I believe was made at Kokubunji. Bet you didn’t
notice!

Here is a close-up of the markings,
which differentiate this pistol from the earlier Chigusa one I have. If you
compare this one to the 3,2 date Chigusa shown as the
first pistol in the Type 14 gallery, you can see that this one has the kanji sho (as in Showa) preceding the date
(7,3). This symbol indicates the date refers to the reign of the Showa Emperor,
i.e. Hirohito. Specifically, this one was made in Showa 7,3,
i.e. the third month of the seventh year of his reign, or March, 1932 in
Western terms. In order to make space for the addition of this character,
starting about Showa 4,12 (December, 1929) the Nagoya Arsenal symbol was moved
up to where it is on all subsequent Nagoya and Nagoya-supervised production,
i.e. in front of the serial number (7243). The Nagoya Arsenal logo looks like a
top-heavy 8 in a circle. The “horns” formed inside the left and right sides of
the larger circle are intended to represent the shachi, or mythical dolphins, that adorn the ends of the roof of

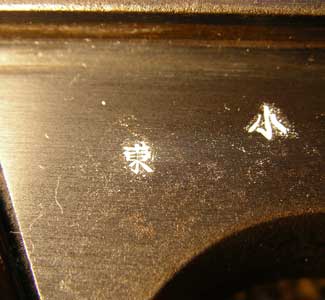
On the other (left) side of the gun
in roughly the same spot are these two inspection marks. The one on the left is
the to in
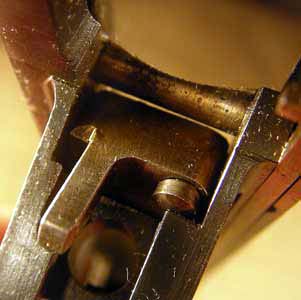
One of the modifications was the
retrofitting of a magazine safety, which was not originally part of the design.
This little part prevents the gun from being fired when the magazine is removed
(never rely on mechanical safeties on any pistol; always treat your gun as
loaded and ready to fire, and never point it at anything you wouldn’t want to
shoot). Apparently Japanese troops did not understand that when the magazine is
removed, there may still be a round in the chamber that must be removed in a
separate step, so this part was deemed necessary to avoid accidental
discharges. The tail in the lower left of the photo prevents the trigger from
being pulled back if there is no magazine in the gun. Inserting a magazine
causes it to rotate out of the way. The round hole you see below that part
serves no actual purpose once the gun is finished; it is a leftover from the
manufacturing process. It is drilled in order to provide access to drill the
locking block spring hole, which is directly behind it in the rear of the grip
frame.
The other part of the recall was
installing a shorter striker than was originally used. Originally they used an
87mm long striker, but it turned out to be too heavy. The small striker spring
could not get it moving fast enough to hit the primer hard enough to ensure
reliable ignition. To prevent such misfires, a shorter, lighter striker was
installed. Later the Toriimatsu factory of Nagoya Arsenal took this idea a step further and introduced 65mm strikers. Here is the
striker that came with this gun when I got it and below that, the striker
spring guide (also called the firing pin and firing pin extension). Both these
parts seem odd. The striker is an unusual length (see next photo). Also, this
type of long striker spring guide is usually found on Toriimatsu guns that had
that shorter 65mm striker I referred to above. I will probably end up
installing a shorter guide to make it correct.

Here is what I meant about the
striker length. The top striker in the photo is a regular 73mm striker. Below
that is the one from this gun, which is 77mm long.

In order to install the shorter
strikers, they had to extend the groove in which the tail of the striker moves
so that the shorter striker would be able to reach the primer. The groove in
question is the one in the left of the photo.

This gun came with a proper
(although non-matching) Chigusa magazine. Chigusa magazines are instantly
recognizable because they have a triangular notch for the magazine latch (the
little cut-out just below and to the left of the follower button in the photo).
All other Type 14 mags used square notches.

The magazine’s serial number has two inspection
marks below it. They are the same ones as on the right side of the pistol near
the date.
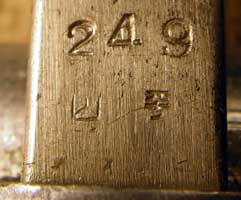
What
I thought was unusual is that the mag also has the little pentagon inspection
mark on the upper face of the base (look down below the 4 in the serial
number).
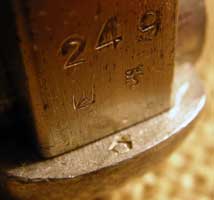
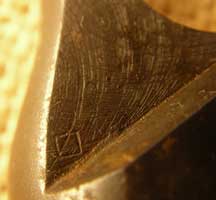
Here is the square inspection mark
on the right rear bottom part of the grip frame. This is the same mark as on my
3,2, although that one has a couple of other marks,
too.
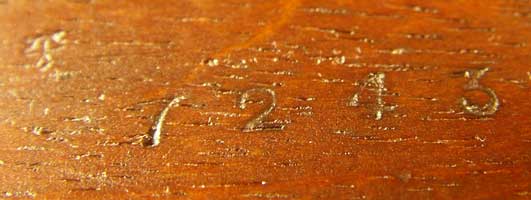
The left grip matches and is
serialized to the gun with all four digits of the serial number. Note also that
there is an inspection mark above and to the left of the 7 in this photo. See
how smooth the inside surface of a Chigusa grip panel is?
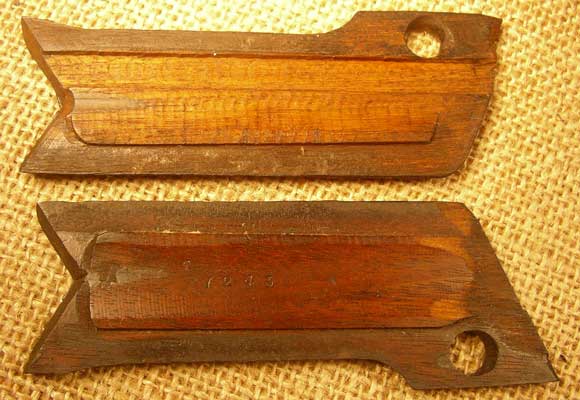
Here is the inside of both grip
panels together. The right grip panel (top) does not match; in fact, it is not
even a Chigusa grip. I think it is from the Kokubunji factory of Chuo Kogyo.
Many grips from that maker were unserialized, like this one. Note how rough the
inside surface is compared to the Chigusa grip (bottom).
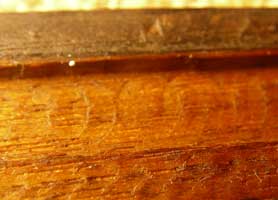
Here is a close-up that shows the machining
marks on the inside of the non-Chigusa grip.
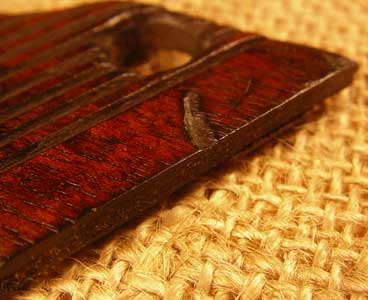
Although the left grip matches the
gun, it is a little loose. Here you can see why: the very thin little
positioning ridge that runs along the top of the grip and fits into a very
narrow slot in the frame has completely broken off. Both the left and right
grips on Type 14s have such ridges, but the one on the left grip is always much
thinner and is extremely fragile. For this reason, one should always exercise
extreme caution when removing the left grip.
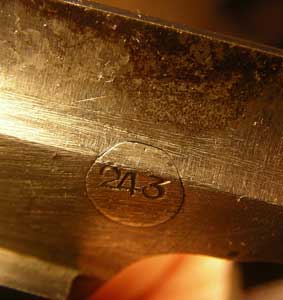
Here is something I haven’t seen on any of my
other Type 14s: the sear bar retainer pin is numbered to the gun!
Although this gun has some flaws,
most notably that non-matching right grip, I was still happy to get it as these
Chigusa guns are quite scarce, and I wanted one of each of the two main
variations in markings. They made about 5000 of the first type with the arsenal
mark in front of the date and then about 2800 like this one with the arsenal
mark in front of the serial number.
Click here to go back to the Type 14 Photo
Gallery: Teri's Japanese Handgun
Website: Type 14 Photo Gallery
Click here to go back to the main page: Teri’s Japanese Handgun Website
Last updated: April 30, 2007. All contents are copyright Teri
unless otherwise specified and may not be used elsewhere in any form without
prior permission.