Nambu World: Showa 3,2 Chigusa Type 14 Photos
I bought this
pistol and my Showa 7,3 Chigusa from a
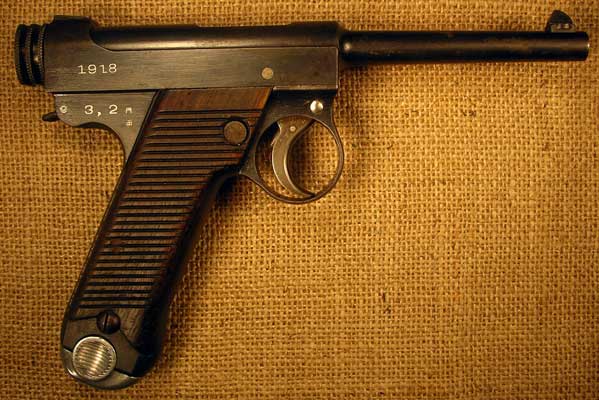
Here is the left side. Chigusa
pistols have some unique characteristics. You probably didn’t notice, but these
grips have 26 grooves. Chigusas have either 25 or 26 grooves (Tokyo Arsenal
also used 26 grooves on early guns, and both Tokyo/Kokura and Kokubunji used
25. Kokubunji later switched to 17, while the last maker, Toriimatsu, used 24
until it switched to grooveless “slab” grips).

Here is one of the unique features.
While later guns have the arsenal mark up in front of the serial number (1918
in this case), on early Chigusas the arsenal mark is lower, in front of the
date (just forward of the lanyard loop). The Nagoya Arsenal mark looks sort of
like a top-heavy 8 in a circle. The “horns” on the sides are supposed to
represent the shachi, or dolphins, that adorn the ends of the roof of

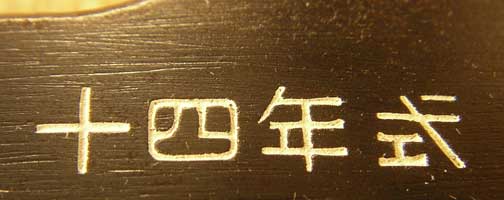
On the left side the marking towards
the back is the same as on other Type 14s, although the fonts used differ
slightly from factory to factory. The characters read from right to left: ju-yon-nen-shiki, or “Type 14”.
A little further towards the front
of the left side are these marks around the safety lever. The one on the left
in the photo (towards the front of the gun) is “fire” and the one on the right
(towards the rear of the gun) is “safe”. The earliest Chigusas did not have the
arrows. Some people mistakenly refer to this lever on the left side as a
takedown lever, but actually it has nothing to do with disassembly. It is just
a safety (never rely on mechanical safeties on any pistol; always treat your
gun as loaded and ready to fire, and never point it at anything you wouldn’t
want to shoot).

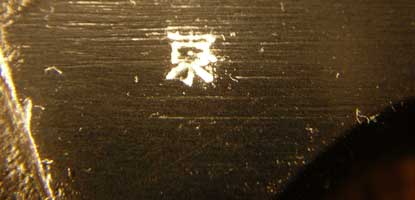
On the left side of the gun below
the model designation and behind the grip is a small flat area. This pistol has
a small inspection mark there, the kanji to
(as in
One of the modifications involved in the recall was to retrofit a magazine safety. This gizmo renders the gun inoperative when the magazine is removed (see disclaimer above re mechanical safeties). Apparently the Japanese found that a magazine safety was necessary because Japanese troops thought that removing the magazine unloaded the gun completely. Of course, this is incorrect; if there is a round in the chamber that round has to be removed in a separate action. Troops who did not understand this caused enough accidental discharges to make a recall and retrofit seem necessary. Fortunately this one is numbered on the front, so I could see that the number matched without removing it. I hate to remove the magazine safety from a Type 14 because they are very hard to get back in. The problem is that there is a little spring-loaded plunger in the lower right corner of the body of the safety (when viewed from the front, as in this photo). Getting the safety positioned so you can get its retaining pin in while keeping this little spring compressed is not easy, and a failed attempt invariably sends the little plunger rocketing across the room into the most inaccessible corner (wear eye protection if you are attempting this!). When the magazine is out the spring causes the body to pivot backwards and the little tail (lower right of photo) moves into position to block the rearward movement of the trigger. Note the nice straw colouring on this part.
The other modification made during
the recall was to install a shorter striker (firing pin). The original ones
were 87mm long and the replacements were 73mm. The reason for this is that they
found the striker spring was unable to get the long striker moving fast enough
to ensure reliable ignition of the primer, so misfires were unacceptably
common. Apparently even the 73mm striker may have been too heavy,
as the Toriimatsu factory that started operation in 1941 further reduced the
length of the striker to 65mm. Below the striker is the striker spring guide,
also called a firing pin extension. Note the flats on the sides. Originally the
shaft was round, but it was found that this also became a cause of misfires
when it was cold. The problem is that this part fits inside the striker when
the gun is cocked and the striker is in the rearward position. When the shaft
was round, the large contact area between the two parts often led them to
freeze together in sub-zero temperatures as are common in

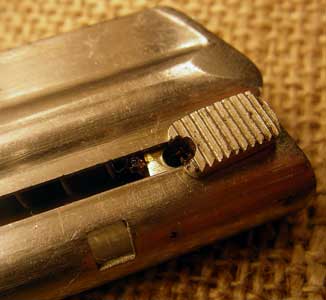
This is the top of the magazine that
came with the gun. As soon as I pulled it out I could tell it was not correct.
Note the square magazine latch notch (lower left of the photo). Chigusa
magazines (and only Chigusa magazines) have a triangular notch. Note the small
round hole in the follower button. It is a little-known fact that the peg-like
tip of the Type 14 cleaning rod fits into this hole so the rod can be used to
assist in pulling the follower down for easy loading of the mag. I don’t
normally do this, however, to avoid marring my cleaning rods through direct
metal to metal contact. I have tried it and it does work, though.
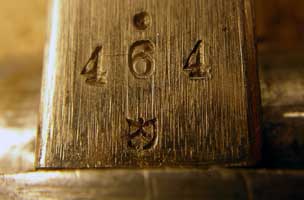
The inspection mark below the serial
number confirms that this is actually a magazine for a Tokyo Arsenal gun. The
character below the 6 is the inspection mark, a stylized version of the
character uchi. The dot above the 6
indicates this was the spare magazine for the gun with which it was issued.
Fortunately I had purchased a
Chigusa magazine in anticipation of the day when I would actually own a Chigusa
pistol. In the lower left of the photo you can see the triangular notch into
which the magazine latch fits. If a Type 14 magazine has this triangular notch,
it is definitely a Chigusa mag. They run almost twice as much as a regular Type
14 mag.

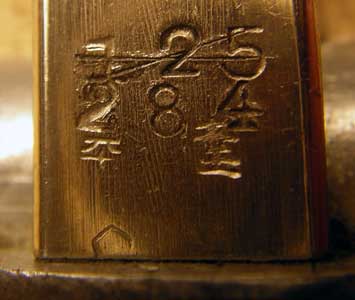
This mag is in pretty decent
condition, but it has obviously served with several pistols. The original
serial number was 125; it has been crossed out and replaced with the serial
number 284. There is yet another serial number (812) stamped on the bottom of
the magazine base! (see next photo). The characters
below the 2 and the 4 are inspection marks, as is the pentagon in the lower
left of the photo. I think these marks may indicate the mag was made a year or
so after the pistol, but I am not sure, and I am just glad to have a proper
Chigusa mag to put into it.
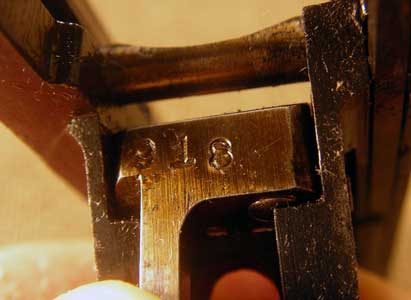
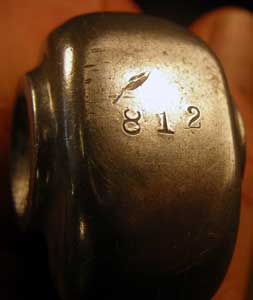
Here is that third serial number on
the magazine base.
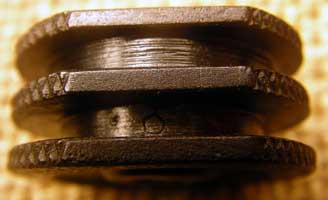
While examining the gun I noticed
this inspection mark in between the ribs on the cocking knob. Seems like a
weird place to stamp a part!
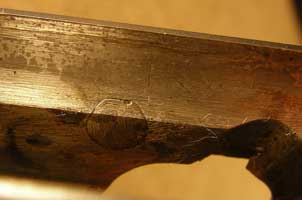
Inside the frame on the left side is
the head of the sear bar retaining pin. Note how the head has been machined to
be flush with the inside of the frame. The sear bar retaining pins on most
later Type 14s from other factories have a standard round head that is just
recessed into a round hole to provide the necessary clearance for operation.
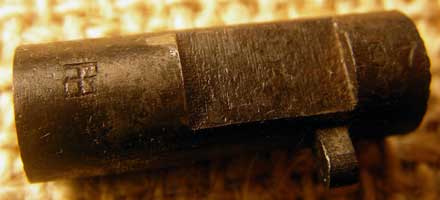
Apart from the magazine the only non-matching
part I found was the magazine latch (the button you push to get the magazine to
come out). The number is on the far right and appears to be 07 (it might be 87,
but I think it is 07). At least the ta
inspection mark on the left of the photo (looks like a four-square
checkerboard) indicates this part is from Chigusa.
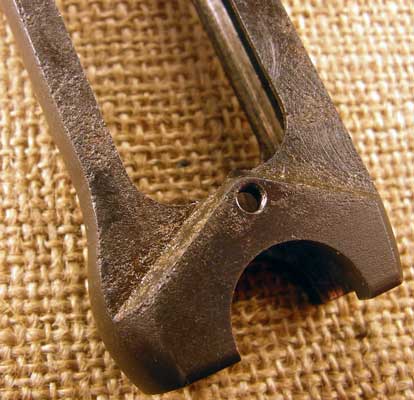
There is a fair amount of pitting
under the grips, especially at the bottom. This is common on older guns as the wooden
grips would hold moisture from sweat or rain against the metal. This is not a
desirable feature but on a gun this rare I was willing to accept it. Note the
square inspection mark on the left of the photo, directly across from the grip
screw hole.

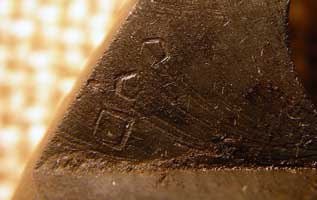
Here is a close-up of the area with
the square inspection mark. Note the two pentagons above it, which are
inspection marks that also appear in numerous other areas of the gun.
Here you can see the left side of
the grip frame has the same pitting problem.
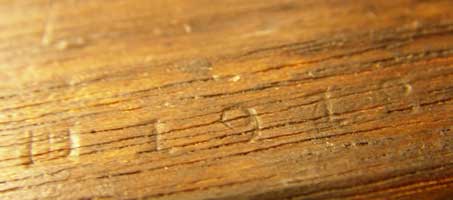
Both grips match and are numbered
1918 to match the gun. Note also the “checkerboard” kanji ta used as an inspection mark immediately in front of the serial
number. The insides of these grips are nice and smooth. Some later guns have
very rough surfaces on the inside of the grips.
There is a small chip missing on the
upper part of the left grip, just below the safety. Note the strawing of the
trigger and the partially visible serial number on the top of the trigger just
where it disappears into the trigger guard.

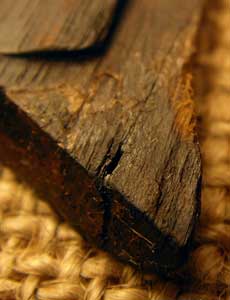
The lower front of the left grip
also has a repair where a chip was glued back into place.

You can see the repair a bit more
clearly on the inside.
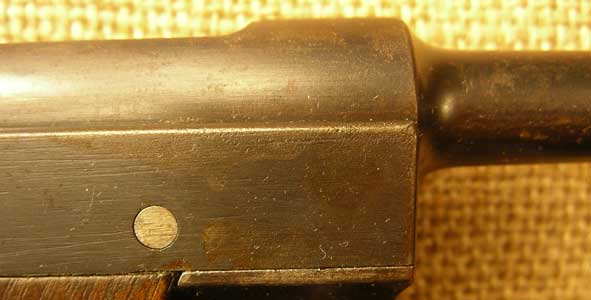
When I bought the gun I knew it had
this slightly discoloured area on the right forward part of the frame just
behind the barrel.
Another very common area for severe
pitting that most people don’t notice is the lanyard loop and the part of the frame
where it attaches. The Japanese almost always used lanyards with Type 14s, at
least partially because the full-coverage holsters made the guns difficult to
draw unless you used a lanyard to help pull it out a bit first. The lanyards
were made of cotton and so tended to hold moisture against the metal, leading
to this kind of deep pitting over time.

While the gun wasn’t quite as good
as it was supposed to be, I was still thrilled to get it as Chigusas are very
hard to find and were a major hole in my collection. About 5,000 pistols have
this style of marking with the arsenal mark in front of the date, and the
remaining 2,800 or so Chigusa pistols have the arsenal mark in front of the
serial number (see my 7,3).
Click here to go back to the Type 14 Photo
Gallery:
Teri's Japanese Handgun Website:
Type 14 Photo Gallery
Click here to go back to the main page: Teri’s
Japanese Handgun Website
Last updated: April 30, 2007. All contents are
copyright Teri unless otherwise specified and may not be used elsewhere in any
form without prior permission.