Showa 18.6 Type 14 Photos (A)
I got this Showa 18.6 (June, 1943)
Type 14 from a lead I picked up at the 2005 Easter Gun Show in

Here is the left side.

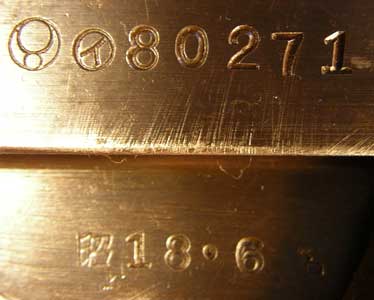
Here are the markings on the right
side of the frame. The first symbol means Nagoya Arsenal. The second symbol,
the “upsdide-down y in a circle”, is the katakana phonetic symbol i (prounounced “ee” as in week). It is
the indicator of the First Series (after 99,999 they attached a phonetic symbol
like this in front of the serial number each time they started in on another
series of 99,999). You can also see some scuffing of the edge of the
frame along the line below the serial number. This was likely done during the
fitting of those plasic grips. The
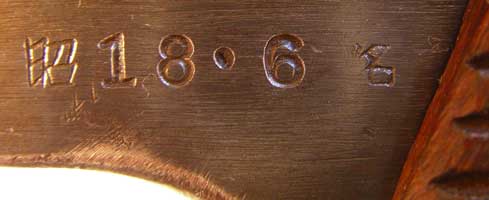
date 18.6 below translates to June, 1944. Due to the shallow depth of field
when taking extreme close-ups like these, I can’t get both the serial number
and date in shapr focus, so I have included a separate photo of the date below.
The character in front of the date
is Sho, short for Showa, the name for Emperor Hirohito’s
reign. The small character stamped to
the right of the last digit in the date in the kanji na as in
The most obvious problem when I got
the gun was that the original 24-groove wooden grips had been replaced with
white plastic ones. The story I was told is that when the gun was imported it
had ivory grips, but these were not allowed into the country due to endangered
species restrictions. Since the gun had no grips, the previous owner’s husband
made these. I don’t like the white plastic look, but they did fit quite well.

The standard wooden grips are held
in at the top by a thin wooden tab that fits in a slot in the frame. The right
plastic grip had such a tab, but the slot in the frame on the left is usually
thinner due to the need to allow space for the sear bar. Perhaps this required
a tab thinner than the gentleman could make, but in any case the left grip had
no tab and was held on by this pin in the upper left corner of the grip. This
pin passed through the hole for the pin on which the magazine safety pivots. It
is longer, of course, and was peened a bit on the left side to help hold the
grip snugly. Here you can also see another problem discussed below: the trigger
pivot pin (silvery circle on the far left of the photo) had been removed at
some point to provide access to the parts inside the trigger group. This pin is
peened in at the factory and should never be removed unless there is a need for
a serious repair (highly unlikely). In the case of Toriimatsu guns, after
peening the two ends of the pin, the ends were machined flush with the trigger
guard so they can normally hardly be seen. I’ll discuss the problems the
removal of the trigger pin caused below.

When fitting the grips, the gentleman had
caused some damage to the finish by grinding and buffing the edges of the grips
while they were on the gun.
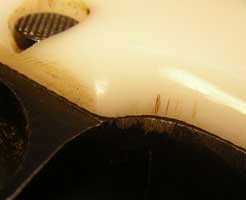
Some buffing damage to the finish along the
front edge of the right grip frame is visible here.
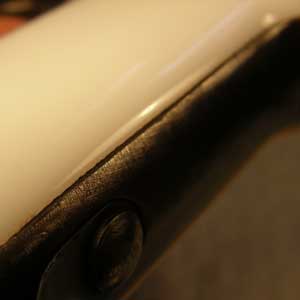
Removing the grips showed a common
problem: even on guns that look really good, one often finds pitting under the
grips. Presumably this is from a combination of sweat and the porous wood
holding the moisture against the metal.

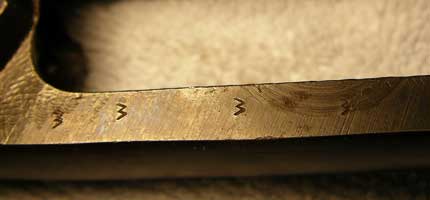
On many Kokubunji and Toriimatsu
Type 14s one finds M inspection marks under the grips. Usually there is one on
each grip corner, but both my 18.6 Toriimatsu guns have all four of the M marks
stacked one above the other on the left rear part of the grip frame like this.
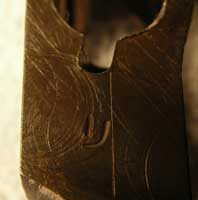
Both also have this ri katakana symbol
under the hole for the magazine latch. The ri is another inspection mark and
comes from the ri in Toriimatsu.
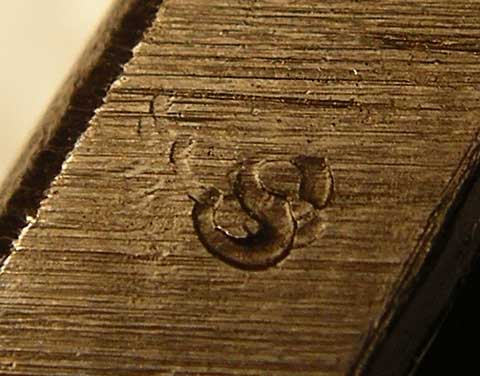
What is unusual, however, is this S
inspection mark on the right rear part of the grip frame. It is not listed in
the Derby & Brown book (see. p. 153). By that time Japanese armaments makers
had also generally ceased the use of Roman (i.e. English) letters on their
products due to war-inspired nationalism.
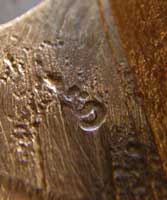
This shot shows the same S mark at the right
rear corner of the frame.
Normally all major parts would carry
the last three digits of a gun’s serial number plus inspection marks of the
factory where they were made. Not all makers of the Type 14 numbered some of
the smaller parts like the striker and striker spring guide. However, early
Toriimatsu guns did have numbers on these parts and this gun has both a
matching striker and striker spring guide (also called a firing pin extension).

My friend Jim Kemp, a
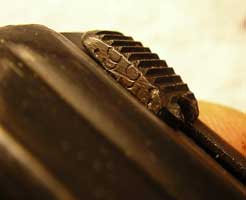
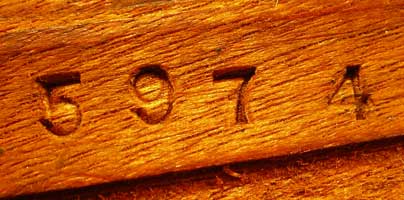
As noted above, I had to replace the grips, so
the number doesn’t match (Toriimatsu grips usually have the last four digits of
the serial number on them).
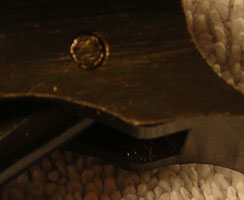
Remember up above I pointed out that
someone had got overenthusiastic when disassembling this gun and had removed
the trigger pivot pin? Well, here’s the right side, where the cosmetic damage done
in removing the pin is also visible (the left side was shown above already).
Normally the peened head of the pin is ground flush and its outline can barely
be seen.
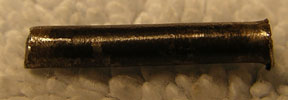
Here’s another good reason not to go
this far in disasembling the gun: in the process of diassembly/reassembly, the
pin got damaged with some slight bends and burrs. As a result, the trigger did
not pivot smoothly on it and when the trigger was pulled, it did not snap back
to its original position the way it should. This meant I had to take the pin
out again and smooth things out with a few passes of a small, fine file. Now it
works OK, but there was no need to take the pin out and cause this damage in
the first place.
As long as the pin was out I thought
I’d take a few pictures of the parts that are normally not viewable
individually so that no one decides to take the pin out of their gun “just to
see what’s in there”. Here’s the inside of the trigger guard. The trigger fits
into that square cut-out just below the tab with the rounded top.
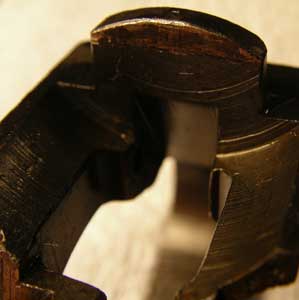
Here is that same spot viewed from below.

This is the right side of the trigger showing
the trigger sear. The number 271 is also stamped at the top of the trigger.
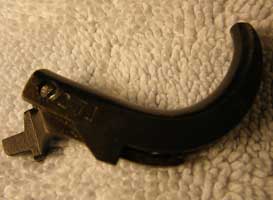
Here’s the left side. The trigger and trigger
sear are pinned together with a spring between them at the bottom of the
trigger sear.
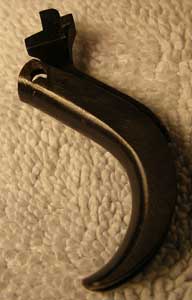
Here you can see the serial number
271 on the trigger sear. The round pin at the bottom is a punch I used to hold
the trigger sear out so the number could be seen while I took the photograph.

Now you’ve seen what’s inside, so there’s
no need to damage your pistol by taking the trigger guard assembly apart. If it
is gummed up, just soak it in solvent and poke away at it with Q-tips and
toothpicks. The same thing applies to any of the other pins that are peened
into place, like the magazine base pins.
Click here to go back to the Type 14 Photo
Gallery: Teri's Japanese Handgun
Website: Type 14 Photo Gallery
Click here to go back to the main page: Teri’s Japanese Handgun Website
Last updated: June 22, 2005. All contents are
copyright Teri unless otherwise specified and may not be used elsewhere in any
form without prior permission.