Papa Nambu Photos (
This gun came from an on-line
auction in the

The left side shows another
differentiating feature: the Papa has a single recoil spring housed in a
channel the protrudes from the left side of the frame (the bump that runs along
the top of the frame). The Type 14 has two recoil springs that fit into recesses
in the sides of the bolt and therefore has a symmetrical cross-section.

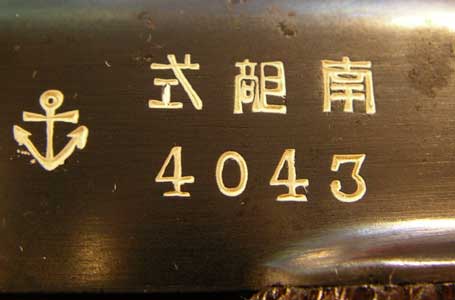
The top row of the markings on the
right side reads from right to left: Nam-bu-shiki,
i.e. Nambu-type. Although people tend to refer to all Japanese pistols as
“Nambus”, actually only Grandpas, Papas and Babys bear the Nambu-type
designation. Off to the left is the naval anchor marking. This is called a Type
B anchor marking, which is fairly deep and has a V-shaped bottom. The earlier,
Type A marking is shallower and more rounded on the bottom. In this close-up
you can see that although this is a beautiful gun in much better than average
condition for a Papa, there are still a few light “freckles” here and there.
These don’t really show up in full-size photos; you really need extreme
close-ups to get a good handle on the condition of the finish. The markings
appear white because they have been highlighted by filling them in with a white
grease pencil (sometimes called a china marker). Collectors often do this when
displaying guns so you can see the markings more easily. It comes off with any
solvent like gun cleaner or mineral spirits (paint thinner). Some people use
talc or chalk, but I would never use these due to the risk of abrasion to the
finish. A grease pencil is just soft grease and so will not harm the finish.
You dip it in solvent to soften it before applying, then wipe off the excess
with a finger tip.
On top of the chamber is the logo of Tokyo Gas
& Electric.

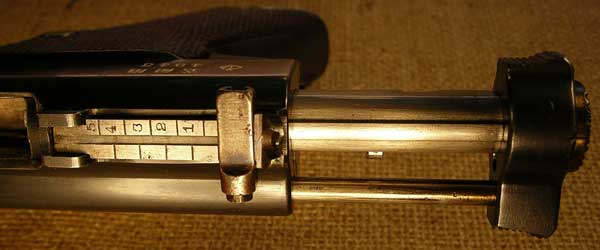
This view of the top rear of the
pistol with the bolt locked back shows the features that differentiate the Papa
from the Type 14 a little better. Note the tangent sight graduated up to 500
metres, the asymetrical cocking knob, and the recoil spring guide rod that is
housed in the bump along the left side (bottom of photo). If you look
carefully, you can also see a little silver-coloured tab projecting below the
bolt, about half way between the rear of the frame and the cocking knob. This
is the tail of the striker, which projects from the left side of the bolt on
the Papa (and Baby), rather than the bottom as on the Type 14.
Here is another view of the bolt,
this time removed from the pistol. This one shows the left side, with the tail
of the striker sticking out of the slot in which it travels. The same slot is
in the bottom of a Type 14 bolt. Note the notch in the bottom of the bolt. That
is for the upper lug of the locking block (see below).

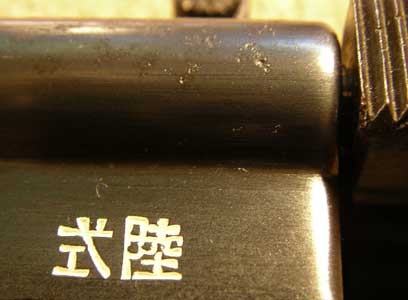
The left side has only this small,
two-character marking. Again, it is read from right to left: riku-shiki. That means “Army-type”,
which is ironic since the Imperial Japanese Army never adopted the Papa (the
Navy did, in 1909). Another, rarely used term for the Papa is the Nambu Pistol,
Type A modified. In that nomenclature, the Grandpa is the Type A and the Baby
is the Type B.
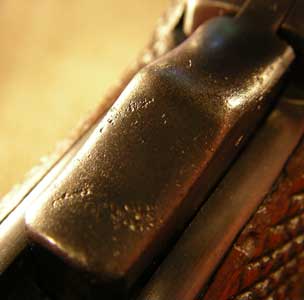
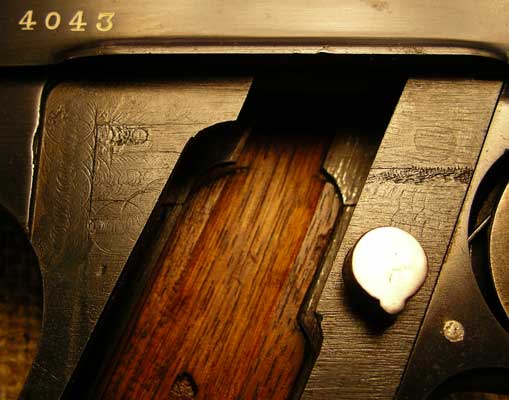
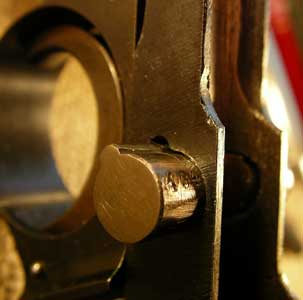
This little checkered “button” on
the left side is the cause of much confusion. It is not a safety, as many
people assume: the only safety on a Papa is the grip safety. It is actually the
head of the sear bar retainer pin. The arrow is to indicate alignment, not
direction of movement (the pin does not move side to side). Misunderstanding of
this point has led many people to damage pistols by trying to force the button
to move in the direction of the arrow.
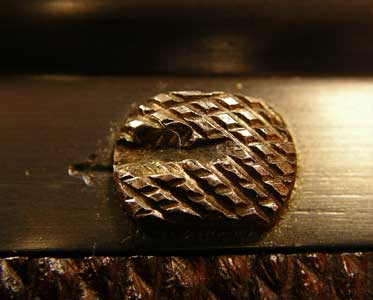
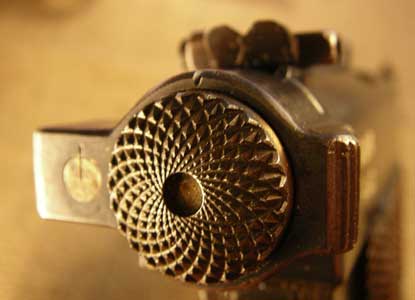
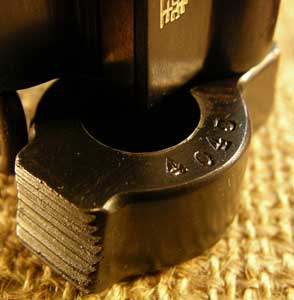
One of the beautiful decorative
features on Papas and Babys is the radial checkering on the back of the bolt
lock and striker spring guide. Similar checkering is found on the back of the
safeties on early Arisaka rifles.
If you are thinking of buying a Papa
or other Japanese pistol that looks pretty good, there are two places you
should always examine carefully. One is the left side of the pistol. This
usually gets more pitting because it is the side that was held close to the
body, where sweat often kept the holster wet. On this pistol the worst spot on
the finish is right at the front of the recoil spring housing along the left
side—exactly the part that sticks out the furthest and would be in most
frequent contact with the sweat-soaked holster.

The other spot to look is the grip
safety, or on guns without them (e.g. Type 14s), the grip itself. This again is
an area that is often in contact with sweat. Almost all guns have some pitting
in these areas, so discovering it doesn’t mean you shouldn’t buy the gun, but
it may give you a bargaining point with the seller, especially if he hasn’t
noticed it before.
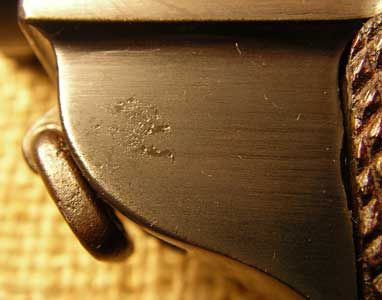
Here’s something most people don’t
know about Papa Nambus. Note the flat panel behind the grip on the right side
of this pistol. Compare it to the panel on one of my Tokyo Arsenal Papas in the
next photo. Lanyard loops are another area where there is often pitting due to
the cotton lanyard retaining moisture and holding it in contact with the metal.
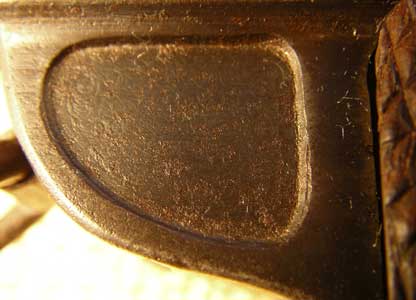
Here you can see that the Tokyo
Arsenal gun has a milled recess in this panel, while my TGE gun does not. Tokyo
Arsenal made one-piece Papa frames, while TGE made two-piece frames. The way
you can tell which one a gun has is by looking at this little panel. If the gun
has a flat panel, it has a two-piece TGE-made frame (above), while a milled
recess in the panel indicates a one-piece Tokyo Arsenal-made frame (below). TGE
made some of its Papa Nambus on Tokyo Arsenal, one-piece frames, so you can’t
asume all TGE guns have the two-piece TGE frame.
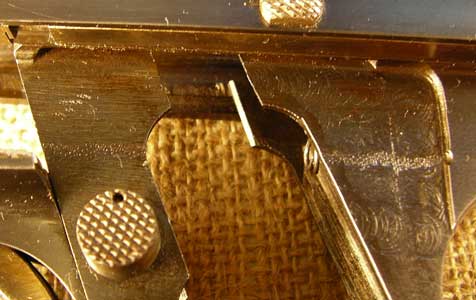
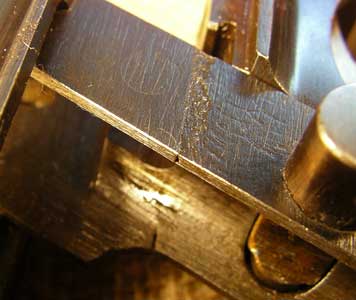
I knew about the two-piece TGE
frames, but until I got this gun I did not know how they were constructed: were
the two pieces top and bottom, left and right, or what? Here you can see the
answer. With the right grip removed you can see the seam where the two halves
were joined. It runs horizontally just above the magazine latch (the
silver-coloured round thing on the right side of the photo).
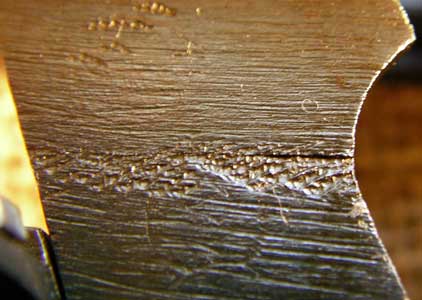
The left side has a similar seam.
This extreme close-up shows the seam on the
front half of the left side of the grip (wooden grip panel removed).
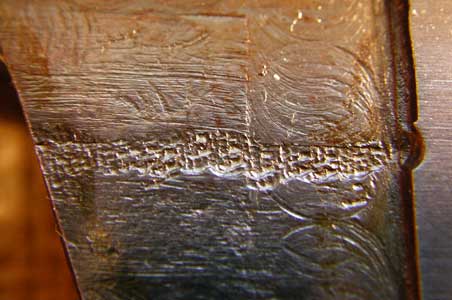
This is the left rear part of the seam.
With the gun tilted, from the right side you
can see the seam crossing through the magazine well.
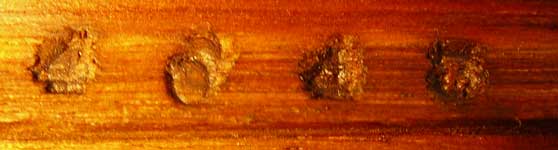
Almost all the parts on this Papa are
serialized with the full four-digit serial number on the gun, including the
insides of both grip panels.
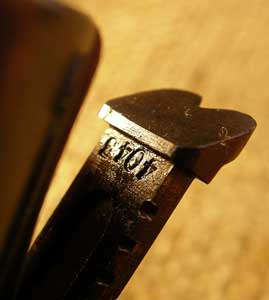
The rear end of the striker has these tiny
little numbers.
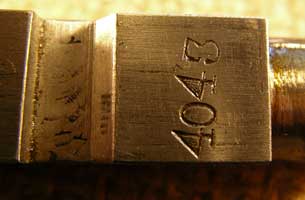
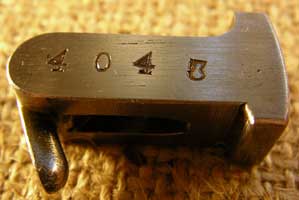
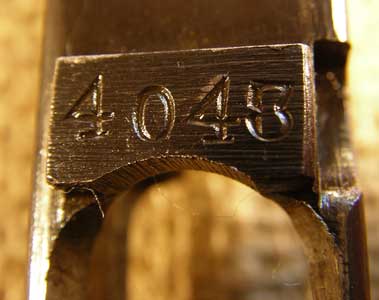
This is the number on the bottom of
the bolt to the rear of the gun. It can be viewed without disassembly just by
pulling the bolt back and looking at the bottom. On the left of the photo is
the notch in the bottom of the bolt into which the locking block fits when the
bolt is in battery (forward position).
The locking block is numbered on the
left side. The lug on the top fits into the aforementioned notch in the bottom
of the bolt. The tail on the lower left engages a spring that fits horizontally
into the frame to operate the locking block.
With the gun upside down and grip
panels removed, from the right side you can see the serial number on the
magazine latch even without removing it.
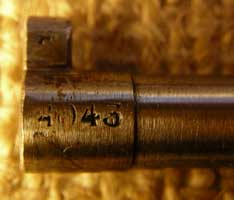
The number on the cocking knob is on
the front face and can be easily viewed just by pulling the bolt back. Here I
rotated the knob so it would stay back for me to take the photo.
Even the tangent sight has these tiny little
number underneath!
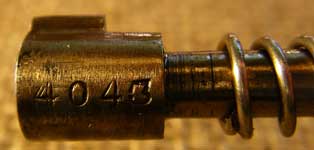
The recoil spring guide has its
number on the front end. You have to take it out to see the number. Most people
are not aware that the front tip of the bolt lock/striker spring guide of Papa
and Baby Nambus fits into a recess in the front of the recoil spring guide so
you can push it back far enough that the cocking knob rotates freely and can be
screwed off. I usually use a short piece of wooden dowelling instead to avoid
any risk of scratches.
The bolt lock & striker spring guide has
its number on the shaft.

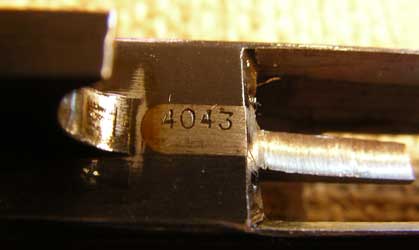
The barrel assembly is numbered on the bottom
just in front of the hole for the magazine well. Disassembly is required to see
it.
Just to the rear of the hole for the magazine
well is the ejector, which is also numbered.
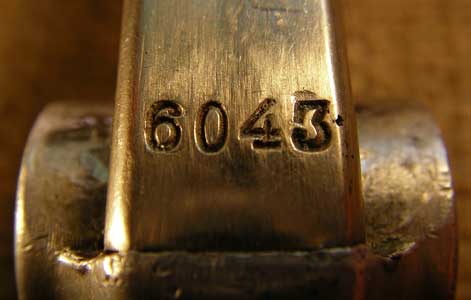
The only part on this gun that is
not matching is the magazine. The person who auctioned this gun tried to make a
big deal fo the fact the last three digits of the serial number on the mag matched
the last three digits of the serial number of the gun. However, while this is
an interesting coincidence, it is completely meaningless. In fact, Tokyo Gas
and Electric never made any guns in the 6000 serial range, so this mag is from
Tokyo Arsenal: not only not from the same gun, but not even the same
manufacturer! I am not aware of any way to tell which of the two makers of Papa
Nambus made a magazine apart from the fact that certain serial ranges were only
made by one maker or the other. Most of the serial numbers were made by both
makers, so not all mags can be indentified this way. Tokyo Arsenal started
making Papas around serial number 2400 and went to around 7050. TGE started at
1 and went to 4999, then made some in the 8000 to 8700 range. So if a Papa mag
has a number below 2400 or in the 8000 range it must be TGE. If it is in the
5000 to 7050 range it must be Tokyo Arsenal. If it is in between 2400 and 5000,
it could be either. If anybody knows another way to be more definitive, please
let me know. There may be differences in the fonts used in stamping the serial
numbers or something.
I was really pleased to get this
beautiful gun. A Papa in this condition is a very nice addition to any
collection.
Click here to go back to the main page: jhg.htm
Last updated: June 6, 2006. All contents are
copyright Teri unless otherwise specified and may not be used elsewhere in any
form without prior permission.