Papa Nambu Photos (
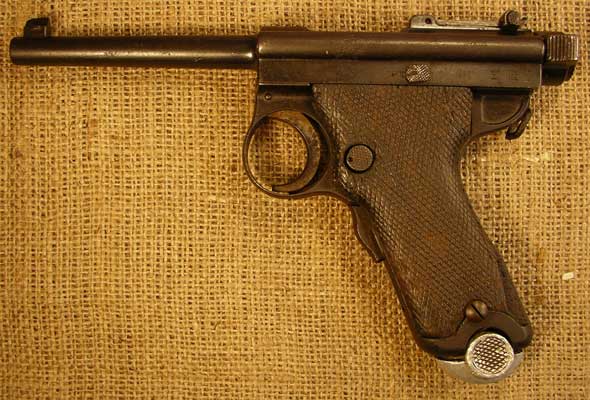
This gun came from a

The left side shows the usual
heavier pitting and a chip out of the grip in the lower rear area. The grip
screws were very badly rusted, especially the left one, so they were replaced
by a set of reproductions made by Don Schlickman (my section on Parts has a
link to his price list). Still, the grips are very loose.
The right side has the usual Nam-bu-shiki (Nambu-type) marking above
the serial number.
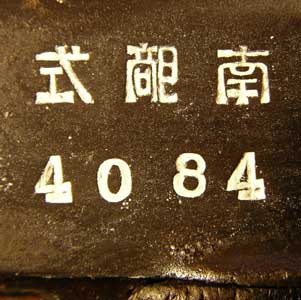
This symbol on the top of the frame
indicates Tokyo Arsenal manufacture. While it looks a bit like a cloverleaf, it
is intended to represent a stack of four cannonballs viewed from above. It
looks a lot like a Krupp logo from the 1800s that I saw once. I don’t know
whether the similarity is intentional.

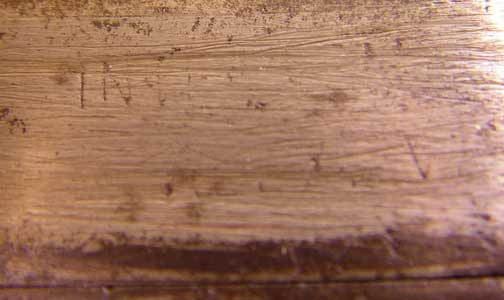
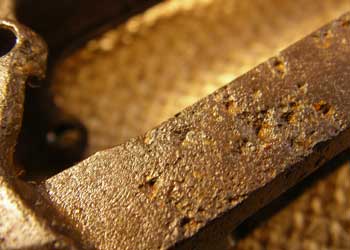
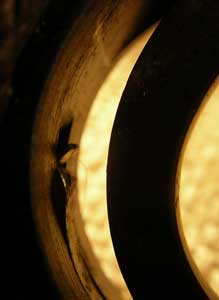
When I decided to purchase this gun
I knew about this large area where the bluing was gone, but I didn’t know why.
When I got the gun and gave it a close examination, I discovered the reason; a

Here is an extreme close-up where you can see
it a bit better, though even in person this is very hard to make out.
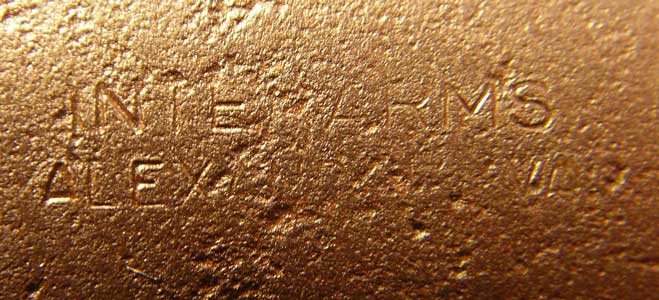
I always give my guns a good
cleaning and very close examination when I get them. Doing so revealed another
very faint mark on the rear of the grip frame near the bottom, in a very pitted area (grip frames are often pitted due to
exposure to the salty sweat of the hand). This can be read fairly easily once
you see it, and confirms that the importer was INTERARMS (first line),
As is often the case, under the grips, where
the wood holds the sweaty moisture against the metal, has the worst pitting.
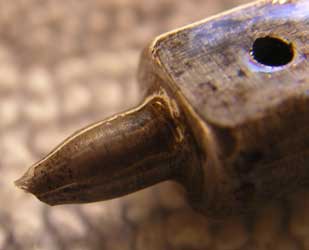
The striker is numbered to the gun, but the tip
has either broken off or been clipped off. It looks to me more like the latter.
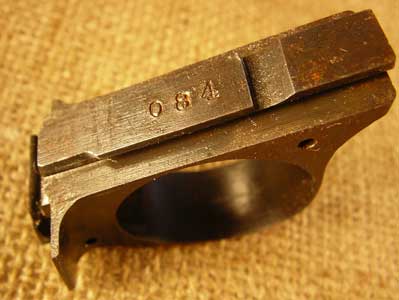
The pins in this gun were looser
than one might desire, so I took it apart further than I would if they had been
tight (my rule is not to take a gun apart further than necessary, especially if
there are pins peened in place, etc., so as to avoid damage or breakage). Here
you can see the serial number on the rear edge of the trigger guard, which is
not visible without disassembly. The parts on this one have either three or
four digits of the serial number, rather than all four on everything as on my
TGE gun.
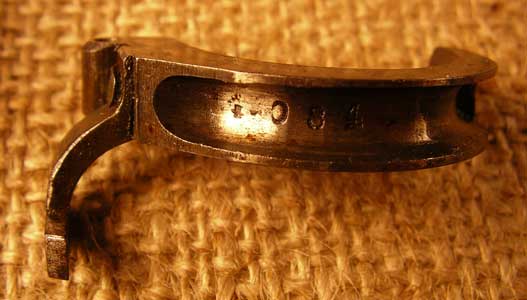
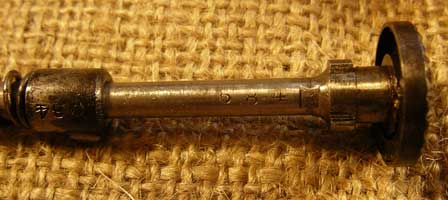
This is a side view of the trigger. It slides out
somewhat awkwardly through a curved hole in the top of the trigger guard.

The serial number is on the back of it.
My close examination revealed that the tip of
the grip safety spring is broken off, so the grip safety (the only safety the
Papa has) does not function reliably.
The bolt lock/striker spring guide
on a Papa serves two other purposes. One is that the tip is used to push the
outer tip of the magazine latch spring down so the button can be removed from
the body (the magazine latch is a two-part item rather than one-piece as on a Type
14). Unfortunately on this pistol the two pieces seem to have rusted together.
There is some slight damage around the bottom of the outer edge of the button
from where someone has tried unsuccessfully to get it off.
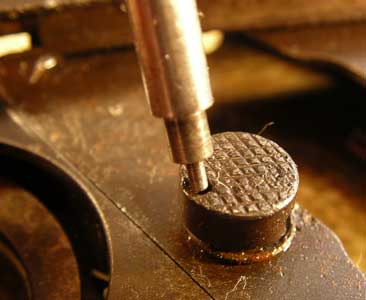
The other way the bolt lock can be
used as a tool is that it fits into the front end of the recoil spring guide
rod. This enables you to push the rod back so that you can unscrew the cocking
knob from the back end of the rod without damaging the finish on the knob or
the rear of the frame. Surprisingly, given the poor condition of this specimen,
all the parts seem to match except the magazine. Well, I am not 100% certain
about this bolt lock. The first number could be either a zero stamped twice due
to a poor first impression, or a 6. However, the chances of someone spending
the energy to find 684 and put it on (4)084 when the gun is this poor are slim,
so I think it is probably 084. One grip panel might also be 4081 rather than
4084, although it is hard to tell due to a poor stamping.
Here is the basic procedure for
field-stripping a Papa Nambu:
1. When
handling any gun, treat it as if it was loaded. Keep the muzzle pointed in a
safe direction and keep your finger off the trigger and outside the trigger
guard unless you intend to fire it. Remember that even a low-powered handgun
bullet can easily penetrate several walls and still have enough power to kill
someone.
2. Make
sure the gun is empty by removing the magazine and visually checking the
chamber. If you don’t know what this means, do not go any further. Find someone
who knows.
3. Push the
bolt lock/striker spring guide in slightly, give it a quarter turn counter-clockwise
and pull it out.
4. Put the
muzzle on a firm but non-marring surface like wood. Push down so the barrel
moves back as far as it can (about 3mm, 0.125 inches).
5. While
holding the gun in this position, push in on the magazine latch button and
slide the trigger guard down.
6. When the
trigger guard is down, the barrel assembly with bolt, striker, etc. can be
removed from the front.
7. I
provide this information for interest only. I accept no liability for any
damage, injury or death you may cause to anyone or anything while handling a
gun. If you don’t know what you are doing, find someone who does.
Click here to go back to the main page: jhg.htm
Last updated: June 4, 2006. All contents are
copyright Teri unless otherwise specified and may not be used elsewhere in any
form without prior permission.