Nambu
World: Baby Nambu Holsters & Accessories
††††††††††† I have two original soft shell
holsters, an original cleaning rod and a spare magazine. Like most Baby
holsters, mine have a soft flap rather than the hard shells seen on many other Japanese
holsters. There is also an extremely rare variant hard shell holster, but there
are only about 30 of them known in
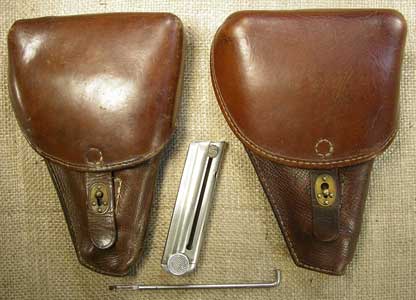
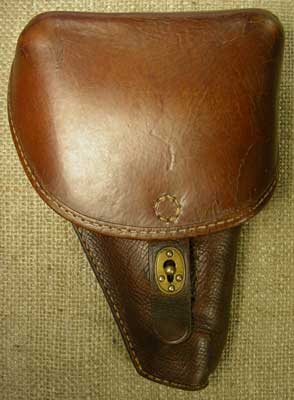
††††††††††† First, here is a front shot of the
one on the left in the photo above. It was the first Baby Nambu
holster I acquired. I bought it from a collector in
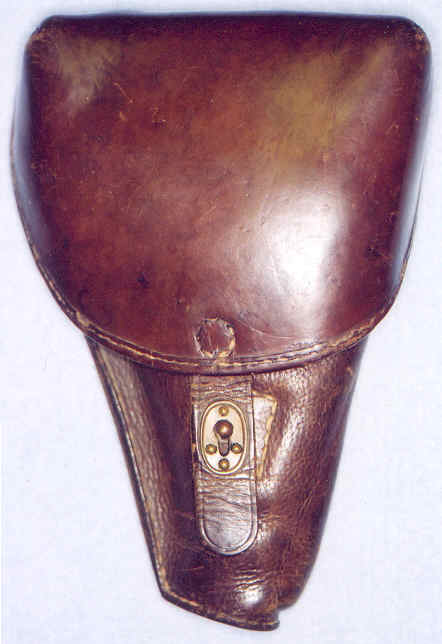
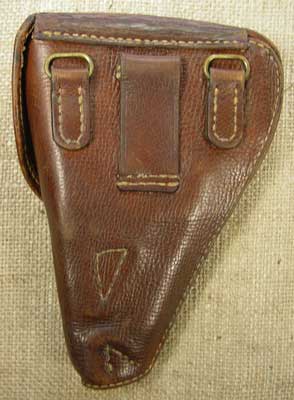
Here is the back. Although the holster is in
very good condition overall, unfortunately it is missing one of the strap
hangers (upper left just below the flap hinge).
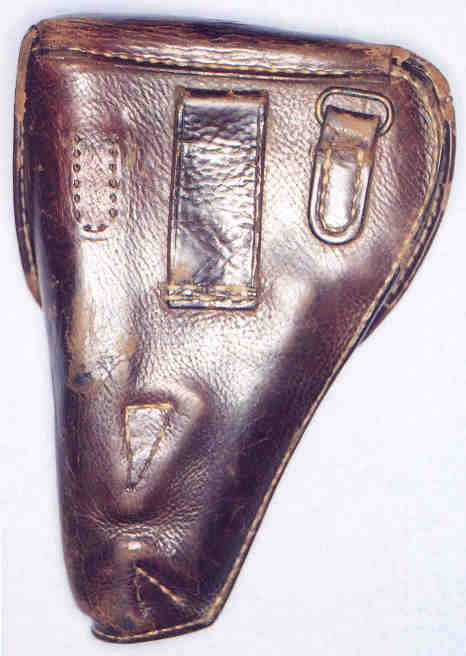
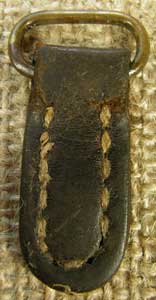
††††††††††† Fortunately, a couple of years after
getting the holster I was able to obtain an original strap ring and its
associated loop when I bought a large amount of stuff from a guy who happened
to have a junker Baby Nambu
holster he was cutting up for parts. The colour is a
bit darker. I have not attached this one yet. I will wait until I know what I
am doing before attempting this.
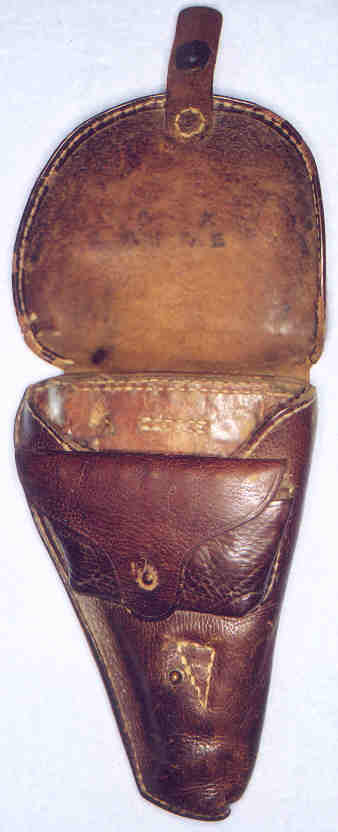
Here is a photo with the flap open and the ammo
pouch closed.
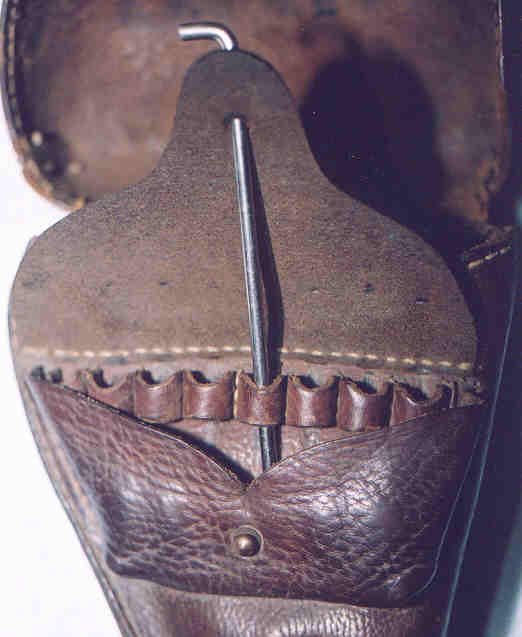
Here you can see the ammo pouch held open with
the cleaning rod. There are loops inside for 14 cartridges.
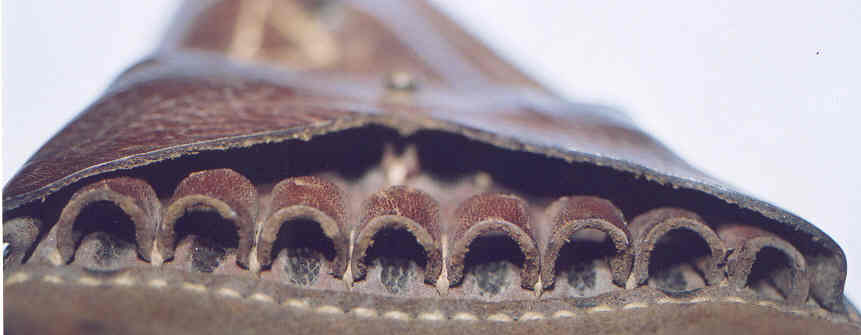
This is a shot from the top looking down into
the ammo pouch. The top row has loops for eight rounds and the bottom row loops
for another six.
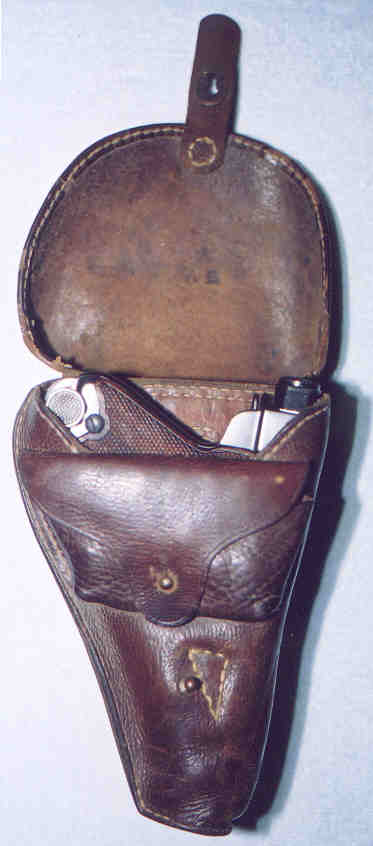
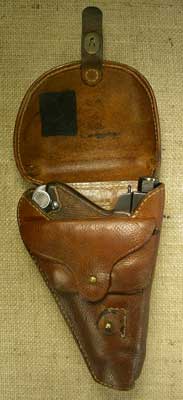
††††††††††† Here is my Baby nestled snug in its
holster. The holster has seen a lot of use, as can be seen from a couple of
loose stitches and a fair bit of wear to the edging around the flap. The plus
side of this is that it conforms perfectly to the gun. The area for a spare
magazine seems too small, though. The gun in it may not have been carried with
its spare magazine, as it should be a little more stretched out in that area, I
think.
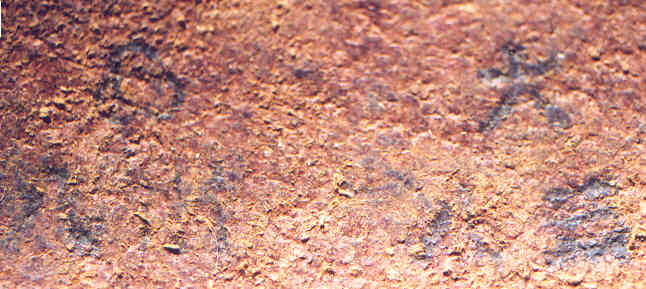
††††††††††† Here are the markings. In the upper
left is the Tokyo Arsenal symbol, four stacked cannon balls viewed from the
top. In the upper right is the character tai/dai. This indicates the Taisho era, though I donít see
a number that would be a date. Below the dai (lower right of photo) are two characters that appear to be the
numbers eight (left) and three (right). This would make the production date of
the holster either Taisho 3.8 (August, 1914) or 8.3 (March, 1920), depending on
whether the characters were printed right to left or left to right (the former
was more common in the pre-war period, so I think August, 1914 is more likely).
The characters in the lower left are even fainter, but the one on the left also
appears to be a Japanese eight. The one to the right of that is so faint I
wonít even hazard a guess.
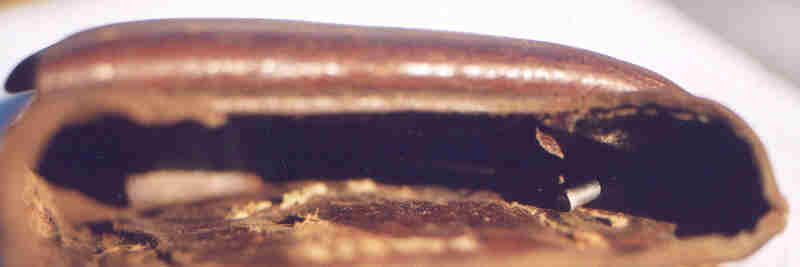
††††††††††† This is a shot from above looking
down into the holster. On the left you can see a blurry image of the leather
block that separates the gun from the spare magazine. On the right you can just
make out the fairly crisp top of the cleaning rod.
††††††††††† I got this second Baby Nambu holster as part of a large collection of several
pistols and holsters that I bought from a collector in
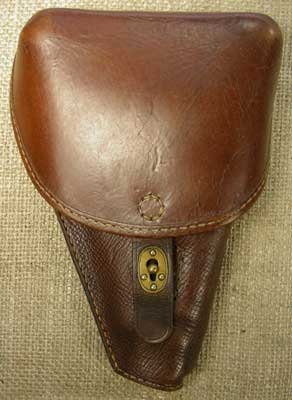
Both strap rings are intact on the back of this
one.
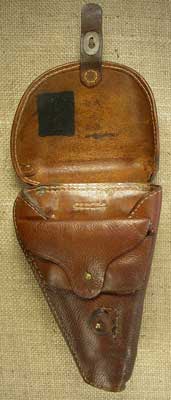
††††††††††† When the holster is opened you can
see a large blacked-out area inside the flap. Note also the repair to the
closure stud. Both points will be covered in more detail below.
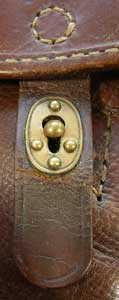
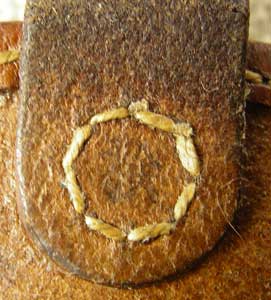
††††††††††† The circle of stitching that attaches
the closure strap to the flap is still quite strong, though there is the start
of a crack across the strap itself just below the brass plate. Note the
decorative groove around the edge of the plate, a common feature on early
Japanese holsters. All the metal fixtures are brass.
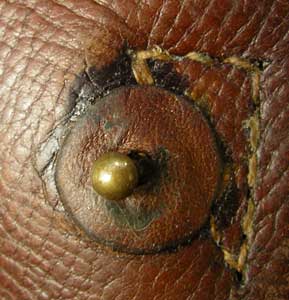
††††††††††† Here is a close-up of the repair to the stud for the closure strap. I think the problem here is that when the stud wore through the front of the holster, proper access to the back of the leather it was attached to (inside the body) was not possible because of proximity to the leather block inside (it is held in place by that triangle of stitching). This could be either a period or a post-war repair, but my guess is the latter.
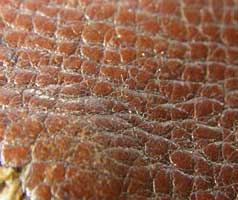
Note the pebble grain of the leather in the body. These holsters are usually made of pigskin rather than cowhide, and pigskin tends to have this pebble grain.
††††††††††† Now letís
look at the markings. The large blacked-out area was probably added to
eliminate the name and other information of the
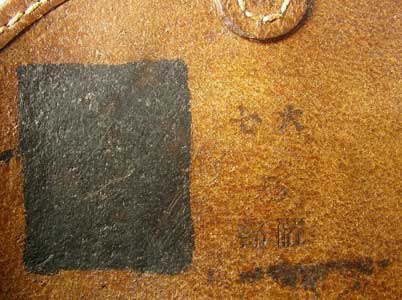
††††††††††† There is also a very faint character on the inside of the closure strap inside the circle of stitching that attaches it to the flap. After spending several minutes squinting at this through a magnifying glass from various angles, my best guess is that it is the character ken, meaning authorized or approved.
The exterior of the ammo pouch.
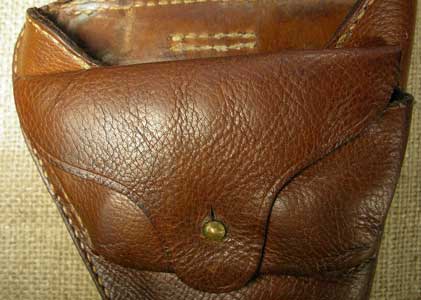
††††††††††† With the pouch open you can see the upper row of cartridge loops. Note the lighter colour inside, which is probably closer to the original colour. Note also the little line of indentations in the ammo pouch flap from the rims of cartridges that were once inserted in the top row.
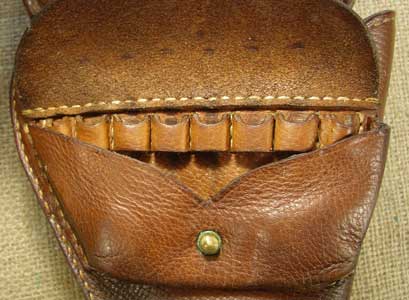
††††††††††† Notice any difference? Now the pouch is full, with original cartridges in all fourteen loops (a Baby Nambu pistol holds seven rounds, so this was enough for two reloads).
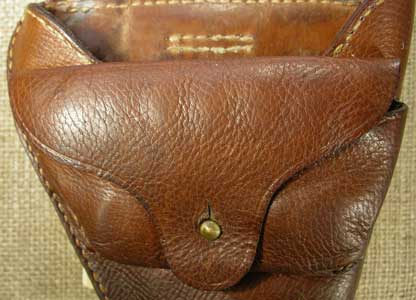
††††††††††† With the flap open you can see the upper row of eight rounds and part of a couple of rounds in the lower row (in the middle where the V-cut descends lowest). You will probably not see this sight very often. It long time to get enough rounds to fill the loops, as the cartridges are very scarce and collectible. They sell for as much as $20-$30 each, if you can find one to buy (no, I am not interested in selling any of mine).
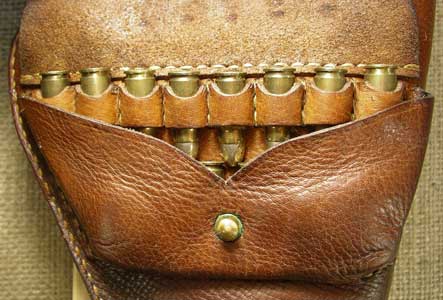
††††††††††† Looking in from the top you can see both the top row of eight rounds and the lower row of six. The loops were in pretty good shape so it was not that hard to insert the rounds. Always be careful when doing something like this, however, as it does put stress on the leather and stitching, which can cause damage if they are not up to the task. Note that Japanese handgun rounds had no headstamps (most rifle rounds didnít, either).
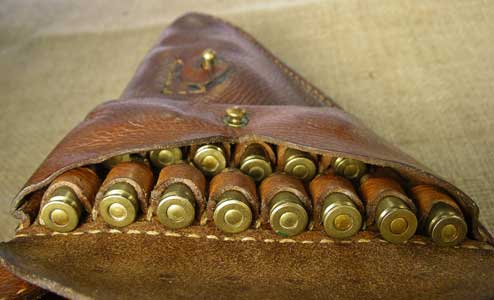
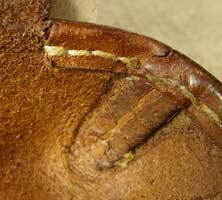
††††††††††† The flap on these Baby holsters is not just pressure-formed the same way was the Papa and later Type 14 holsters were. The corners were sewn together to give them shape, as can be seen in this shot of the inside of the front corner.
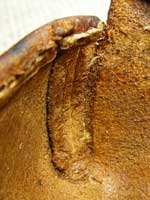
Same thing with the inside of the back corner.
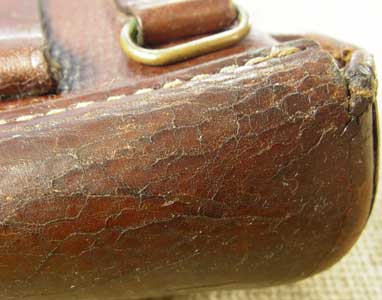
††††††††††† There is crazing of the surface of the leather on the top of the flap, but it does not go deep. There is, however, the start of a crack (look at the far right edge of the hinge part of the flap, just below and to the right of where the hinge stitching ends).
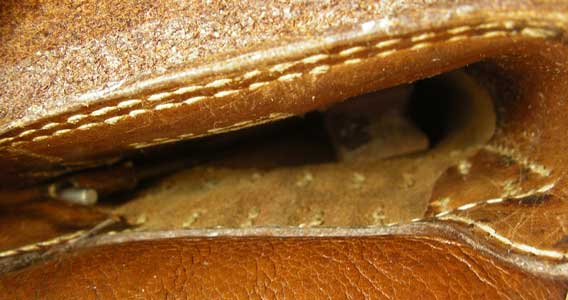
††††††††††† The upper part of the inside of the holster is lined, as you can see here. Some early Type 14 holsters were also lined. Note the cleaning rod off to the left and the stitches for the ammo pouch and cartridge loops (bottom).
††††††††††† Here is a look inside with the cleaning rod and spare magazine inserted. The block to the left of the magazine is made of several layers of leather and serves to keep the gun and mag from scratching each other.
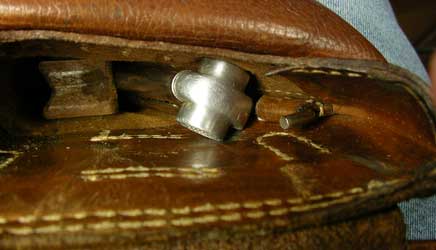
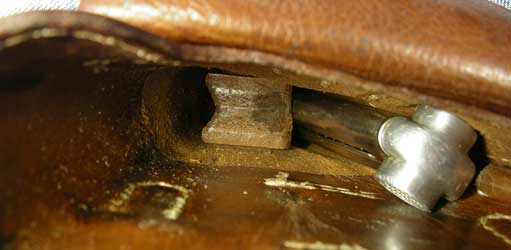
††††††††††† Here is another look inside showing the block better as well as the channel to the right of it for the pistolís barrel to go in.
This is a shot of the holster with the pistol, cleaning rod and spare mag inserted and the cartridge loops full of original rounds.
The same thing, but with the flap open to show the treasures inside.
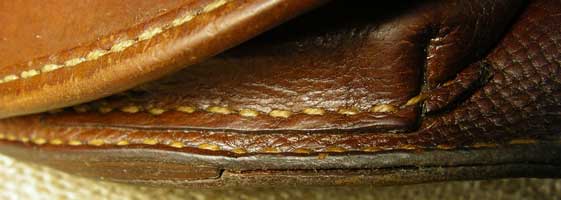
††††††††††† The read edge of the holster is formed by just sewing the two edges of the piece of leather together, with no spacer to add thickness. The two layers of leather sandwiched in between the edges of the holster body (lower left of photo) are the outside edges of the cleaning rod loop.
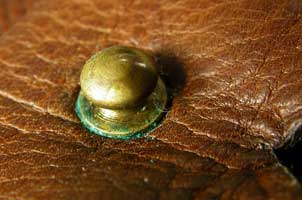
††††††††††† The inside of the ammo pouch closure stud is not covered with a leather reinforcement, unlike later Type 14 holsters.
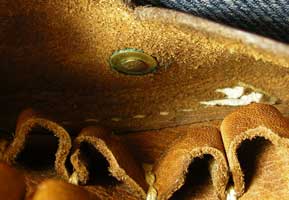
A close-up view of the outside of that stud.
††††††††††† Here is the cleaning rod itself. It
is nickel-plated, L-shaped and about 133 mm (5 ľ inches) long. It was probably
slightly longer when new, as the tip is rather worn (see close-up of tip
below).

Here is that tip, with the wear one would
expect from the business end of a tool.

††††††††††† The rod has an inspection marking on
the shaft near the bend. As you can see here, it looks like an ďAĒ, although
whether thatís what it actually is or not, I donít know.

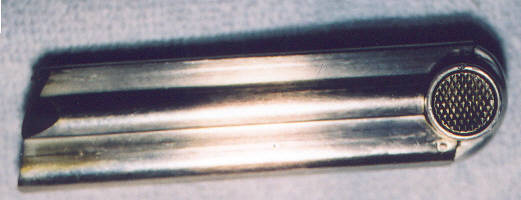
††††††††††† Before I had a spare magazine,† I took
these photos of the magazine that came with my first Baby, serial number 1363
(matching number, as you can see by comparing with photos of the gun itself).
Right side.
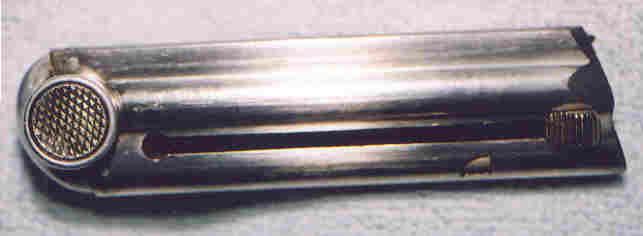
Left side
Back view. Note the serial number at the
bottom.

Here is a close-up of the serial number.

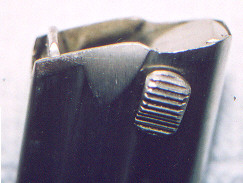
††††††††††† Close-up
of the top showing the follower, lips and button. Note the vertical tab at the
back of the follower (left side of photo). Like all the Nambu
pistols, the Baby has no hold-open device. The bolt locks back on the follower
when the gun is empty, making extraction of the magazine for reloading awkward.
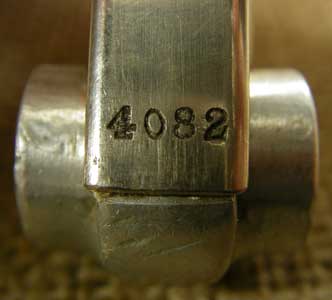
††††††††††† Later I managed to get a spare
magazine with a large collection of pistols and holsters I purchased in March,
2005. These are almost impossible to come by and bring very high prices when
they do come on the market. Here is a close-up of the serial number.
Fortunately this spare mag is just as nice as the ones that came with my two
Baby Nambu pistols.
††††††††††† †
Click here to go back to the main page: Nambu World Home Page
Last updated: July 4, 2006. All contents are
copyright Teri unless otherwise specified and may not be used elsewhere in any
form without prior permission.